REVIEW: Exped Lightning 60 & Flash Pocket

For a while now I’ve been wanting a new pack for winter use as well as for longer multi day trips where I need to carry more than 2-3 days food. My Osprey Tempest 30 is a great pack, but it’s 30L capacity becomes a limit when I want to use my big bulky synthetic winter sleeping bag.

After much deliberation I narrowed my Choices down to 4 packs. Osprey Exos 58(1.37kg), Z-Packs Arc Blast 60(601g), Gossamer gear Mariposa(825g (medium)), and the Exped Lightning 60(1120g). Despite being heavier than both the Arc Blast and the Mariposa, I decided on the Exped. Whilst my kit is lightweight, and getting lighter, I still have heavy synthetic sleeping bags, as well as wanting a pack for use when I need to carry several days worth of food. Working on an assumption of 800-1000g per day for food, a weeks food is 7kg. Given the Arc Blast and the Mariposa seem to top out capacity wise at around 35lb, the 24kg (note unit change) capacity of the Exped leaves me with plenty of comfortable range. Sure I don’t want to carry a 20kg pack any great distance, but knowing that my pack isn’t going to be massively uncomfortable after resupply is nice.

Main Pack
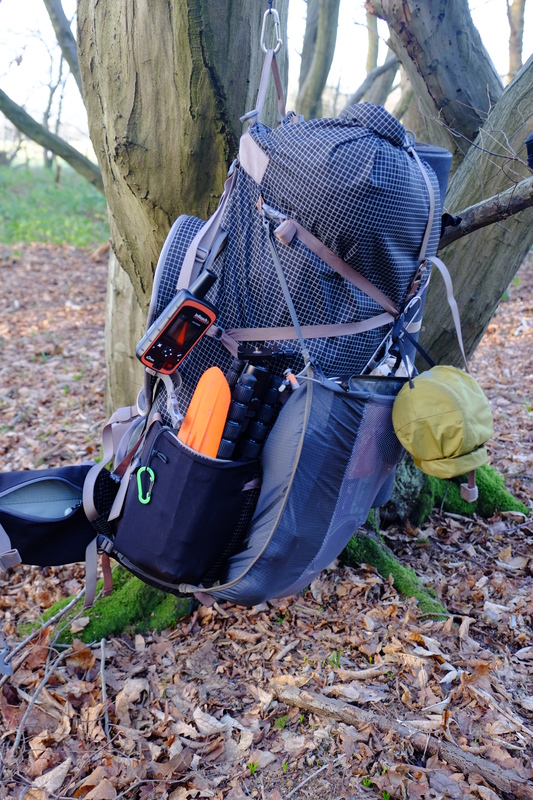
Backpack hanging in tree.

The pack in use with Flash pocket on the outside.

Enough of why I bought it, onto what I bought. The pack is pretty much as basic a pack as you could want. In terms of construction it’s effectively a dry bag style main compartment, with a couple of stretch side pockets, a compression system, all attached to a back system. Exped list the weight as 1120g, my pack comes in at 1070g on my scales.

The bag has a closure system similar to a dry bag, but the seams are not sealed so it shouldn’t be submersed or treated like a dry bag. It’s made from a Dyneema grid stop fabric which doesn’t seem to be that crisp packetty like Cuban fibre and Sil Nylon can be, but not quite as quiet as canvas. The fabric is 210 denier thick, 160gsm nylon with Dyneema reinforcing, all with a waterproof PU coating with a 15000mm hydrostatic head. Or put simply: a durable ripstop fabric. I went for the black pack as it was the colour least likely to stick out when walking in the wilderness. I don’t like bright colours in the outdoors and prefer if I can blend in with my surroundings, rather than being visual pollution.

Next to where the T bar of the back system attaches to the pack there is a waterproof zip that gives access to a pocket. On my first trip out I accidentally left this zip open by a couple of millimetres and it made the contents rather damp. This  pocket is effectively a free floating flap inside the pack, I find it helps when closing the pack to lay it across the top of the contents so you can access it easier from outside. On the inside of the pack the pocket has a separate zipped mesh compartment. Other than that the inside of the pack is just one big compartment, no dividers, no zips, just a simple bag of holding.

On the each side of the pack there is a stretch pocket, these are plenty big enough for a 1L Nalgene bottle, I tend to carry a 1.5L Evernew water pouch in the right hand pocket which fits nicely. When this pack was first released, the side compression strap went over the top of the side pockets greatly reducing their utility. Exped have since released a new version (the 2014 version I have), which routes the strap through the pocket, so that it doesn’t interrupt it’s use. If you want you can still rethread the compression strap over the top of the pocket.

The rest of the pack is criss crossed with a selection of compression straps. These are made of a lightweight webbing tape which isn’t the most stable of straps. If you pull it too tight it tends to curl into a cylinder rather than remaining flat. In practice this hasn’t been an issue to me. The straps are long enough that I can fit a CCF roll mat on the side of the pack. To avoid having excess flapping about in the wind each strap has a velcro wrapping so you can roll up the excess, it’s a nice touch.

Along with the compression straps there is space for a couple of ice axes or similar, plus a few extra loops you could thread with bungee cord if you wanted to add a roll mat to the bottom, or carry something else on the outside.

All in all the storage section of the pack is basic and to the point. In the trips I’ve used it I’ve not found any real issues with the compression straps, or lack of compartments. Exped seem to have got a really good balance of features vs simplicity.

Back System
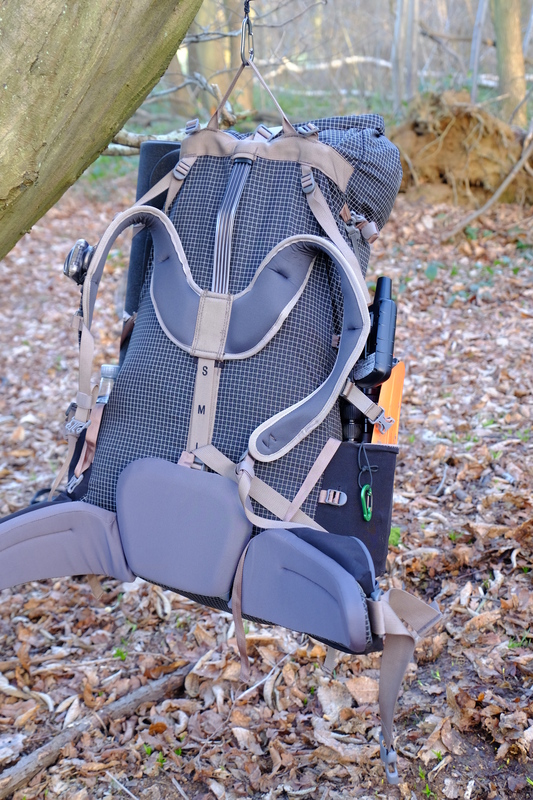
The back system of the pack.

The back system of the pack.

If you judged this pack my it’s storage compartment alone then it would be nothing special, just a simple back pack. Where Exped’s ingenuity has shone through however is in the back system.

The core of the back system is a central corrugated aluminium stay. This slots into a slot at the top of the pack where it interacts with a cross piece and into a slot in the hip belt at the bottom. The hip belt is made up of 3 large foam sections, one fits into the lumber part of your back, and then the two sides wrap round your waist (this is clearer if you look at the photo above). The shoulder harness has a yoke shape which is free to slide up and down on the aluminium stay, but held at their upper reach by a webbing strap marked with S M L (small medium Large), that fits to a tri-glide attached to the hip belt. There are a pair of load lifters that come from the T bar and attach to the shoulder yoke. A grab handle also connects to the T bar.

This arrangement of straps, metal and foam allows for a back system that transfers the load onto the hips like no other pack I’ve tried (I’ve tried too many…). Fully loaded with 10kg of kit, with the waist belt cinched into place, the load is transferred onto the hip belt so effectively that I can loosen off the shoulder straps, and the pack just stays in place. You only really need the shoulder straps to stop the pack from tilting backwards.

Dialling in the back system is not the simplest task, but Exped has released a pair of videos, one on course tuning of the back system, and one on fine tuning it. I spent about 15 mins getting the back system tuned perfectly for me (shoulder yoke all the way down, and the Ali stay bent slightly to match my spine). Having done so I don’t expect to have to adjust it again.

The hip belt has a zipped stretch side pocket on each side. This pocket is large enough for my first aid kit to fit in the left one, and for snacks or a compact camera to fit in the other.

The pack comes in both men’s and women’s fit. Alas Exped have fallen into the trap of assuming women want bright colours and only do the women’s version in Terracotta (a red) and Deep Sea Blue. Neither colour seemed to be ideal for not standing out. On the men’s range it comes in Black or Lichen Green. The green is a bit too light and bright for my tastes. Hence going for the black. One of my few complaints is the choices of colours. I got the men’s pack in black and even with my ample chest it seems to work OK.

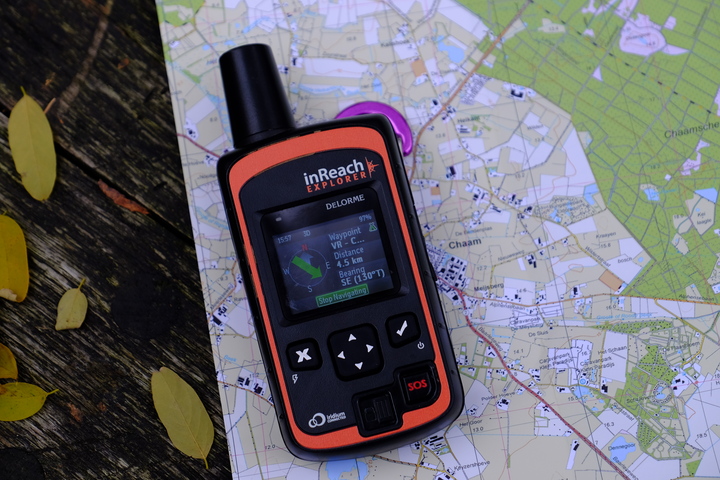
One modification I’ve done is to attach a small loop of bungee to the webbing on each shoulder strap, This gives me a horizontal point to attach my DeLorme inReach Explorer on the left strap, and my Petzl Zipka 2+ on the right strap. It’s a simple mod that adds a couple of grams.

Flash Pocket

To go with the Lightning range of packs Exped have released the Flash Pocket. Weighing 80g, this is a large dump pocket that attaches to the front of the pack. One side of the pocket is solid fabric, and one is mesh, depending on which way round you attach it allows you to either have some weather protection to it’s contents, or an airy breath-ability. I find the flash pocket useful for things like a damp tarp, water proof jacket, and the days food. As well as things I’ve forgotten to put into the pack before I closed it up. At about £8 quid it’s a nice extra to have.

The design of the pocket, whilst intended for the Lightning range of packs, is not limited to them, and could be used with other packs.

Summary

In summary this pack might not be the lightest on the market, but whereas many packs have the sole selling point of their weight, this pack’s ability to carry load more comfortably than any other pack I’ve come across sets it apart, and even justifies the few extra grams.

Light weight, yet able to take those heavier loads when necessary. I can’t recommend this pack highly enough. When I have the money I hope to get the 45L version for when the 60L is overkill.

The only area the pack is let down is in the available colours. If it came in a nice dark green, it would be perfect.

I bought my pack from Backpackinglight.co.uk and the flash pocket from Ultralight Outdoor Gear.

SKILLS: Small cooking fire

When out and about I often find huge fire scars from where people have lit large camp fires and always despair at the damage and the wastefulness of such a large fire.

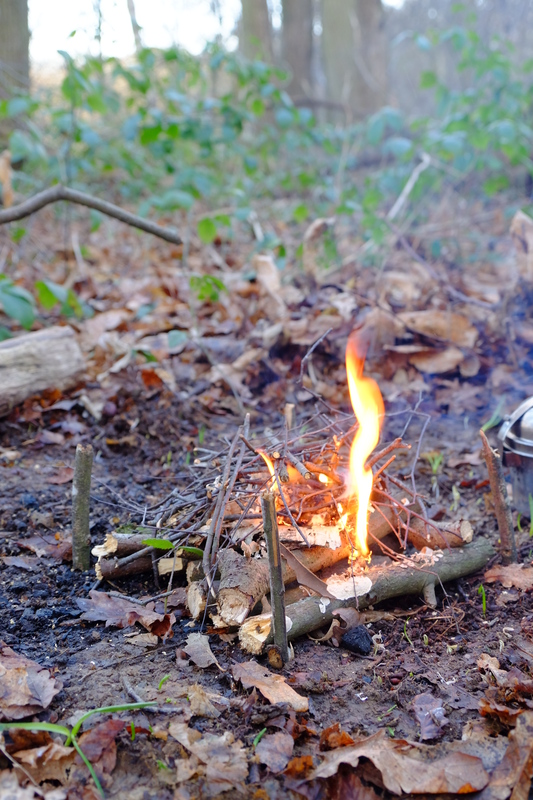
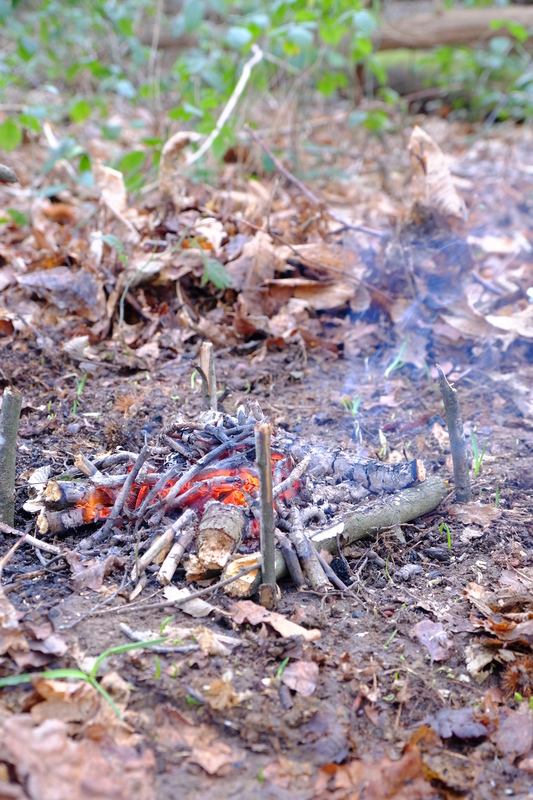
So I thought while I was out in the woods, I’d take some pictures of a simple camp fire that’s big enough to cook over without needing to deforest half of Kent.

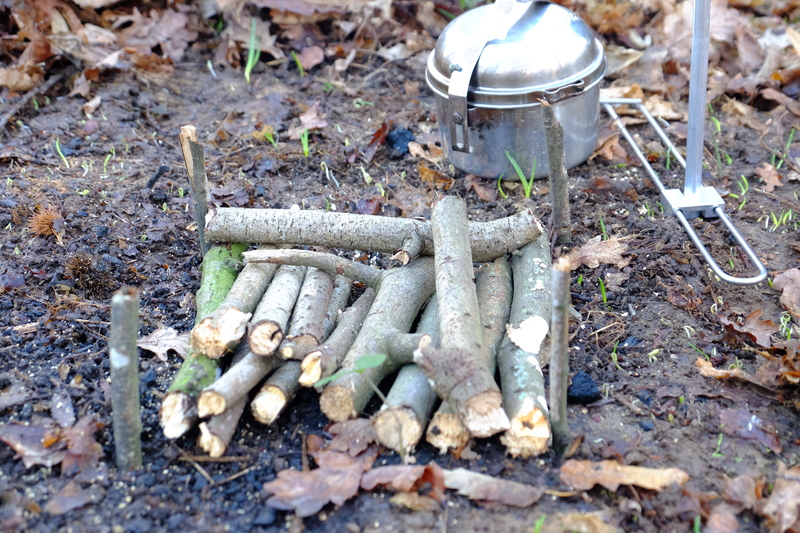
In order to give a sense of size I’ve put 4 pegs in marking a the corners of a square one Bahco Laplander(folded) by one Bahco Laplander(folded) each side. Or if you prefer 235mm x 235mm (approx 9¼” x 9¼” in old money). That’s an area of 0.0552m² (or 0.594ft²).

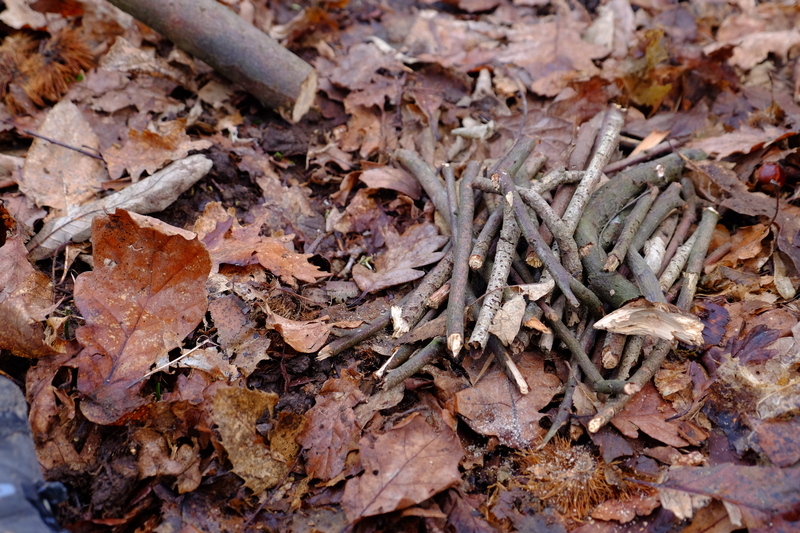
I started off by laying a raft of small logs, these are roughly an inch or so in width.

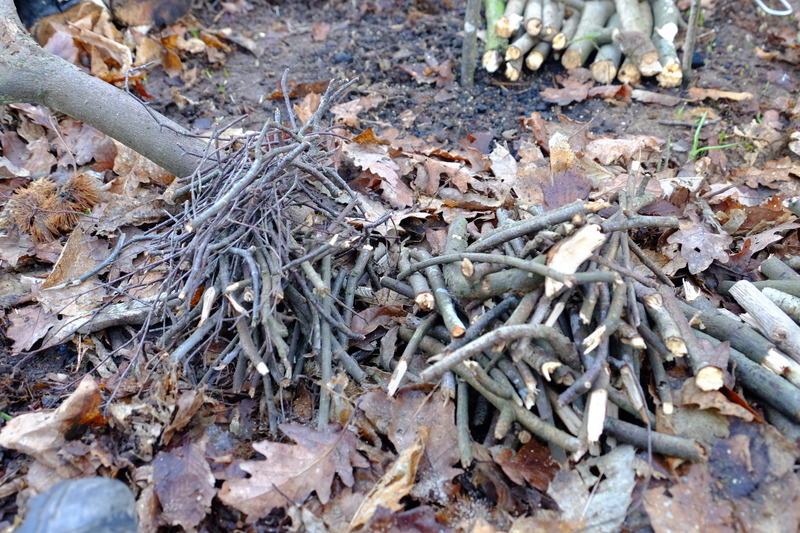
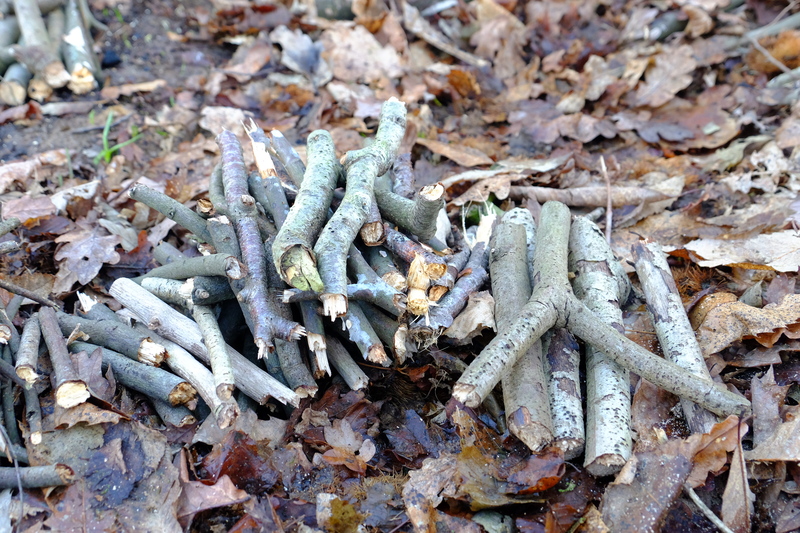
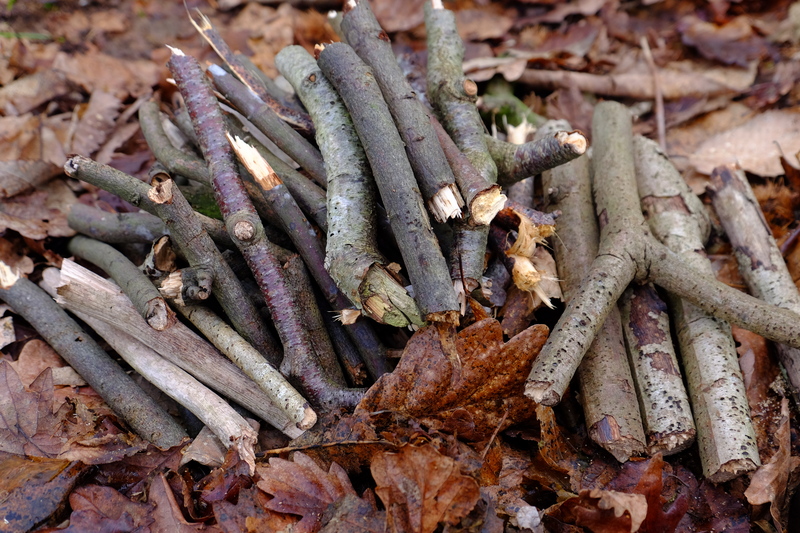
Then I prepared a 4 piles of wood. The first is wood less than a pencil’s width in thickness, then we have finger thickness, then thumb thickness, than a few pieces that were slightly larger.

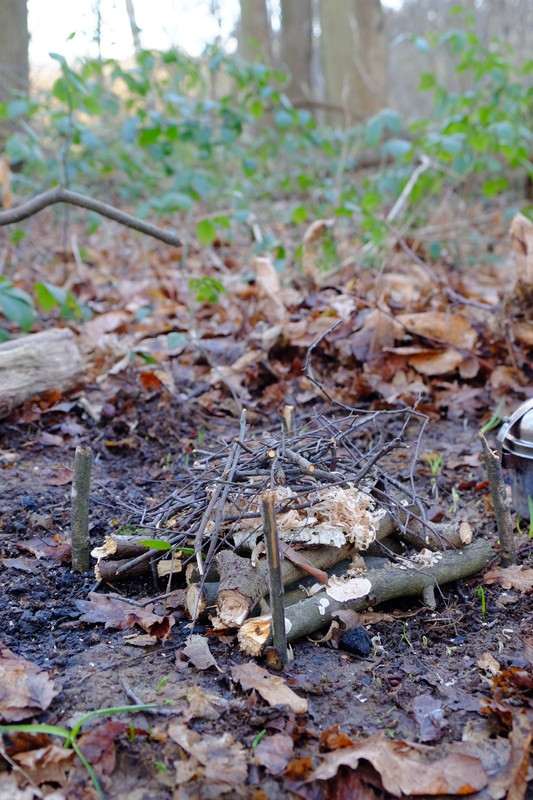
Materials prepared and ready to go, I arranged a small pile on the raft. This consisted of a couple of pieces of birch bark I found on fallen tree, and some wood shavings, with a handful of the thinnest wood on top of that.

With everything prepared, I lit a tinderquik fire tab with a spark from my sparklite. This was then placed into the centre of the wood shavings and birch bark.

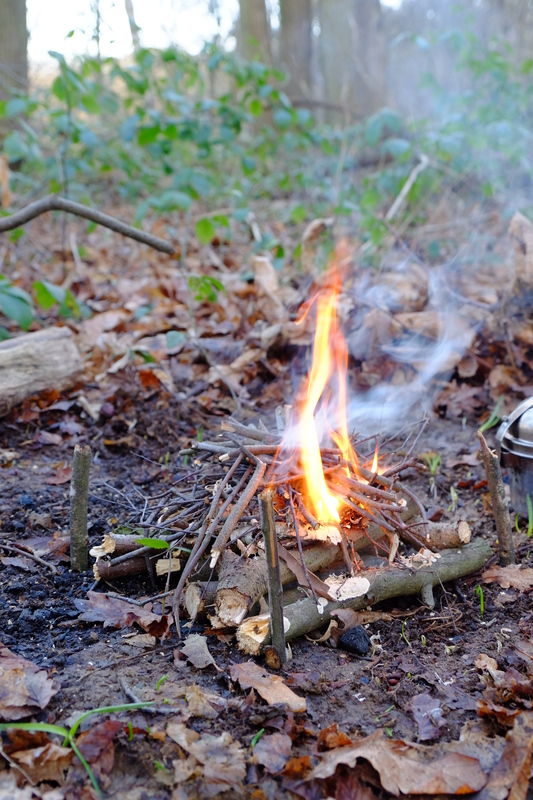
It didn’t take long for the bark to catch the small kindling.

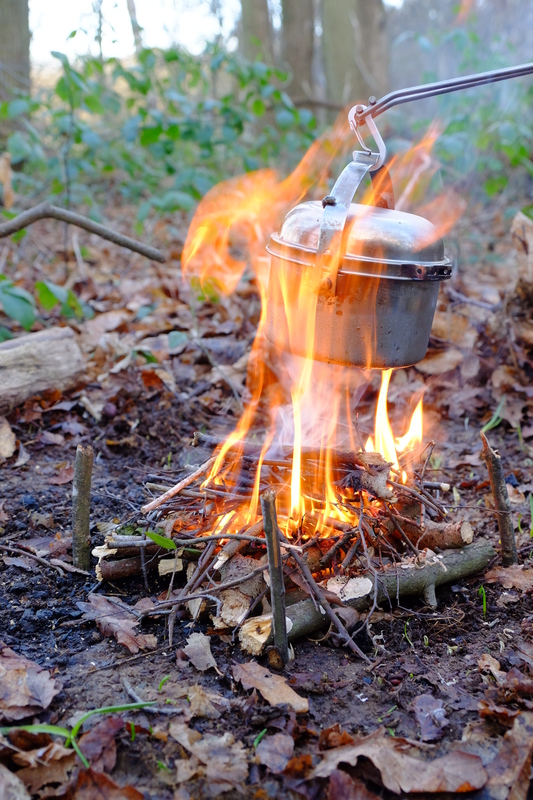
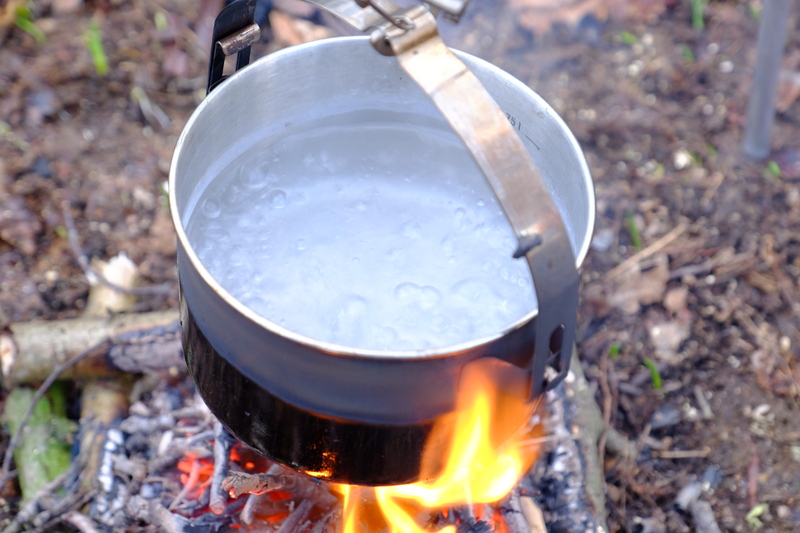
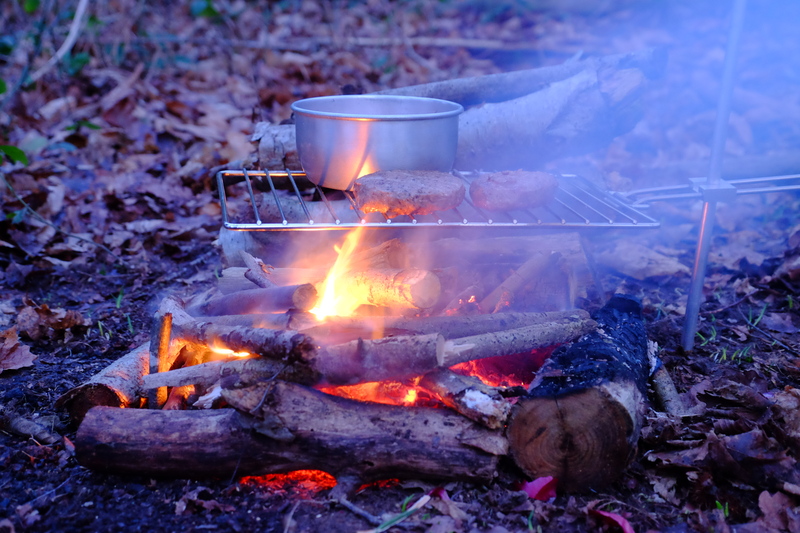
With the fire well lit I fed it with material from the piles, working up in size as each pile was exhausted. I also put a Tatonka 1L billy can over the fire with the 0.5L of water needed to make a mug of tea.

In some respects this fire was a little over kill for the size of the pot I was boiling, but I wanted the ember bed for use later to cook a jacket potato.

But it didn’t take long for the pot to come to the boil.

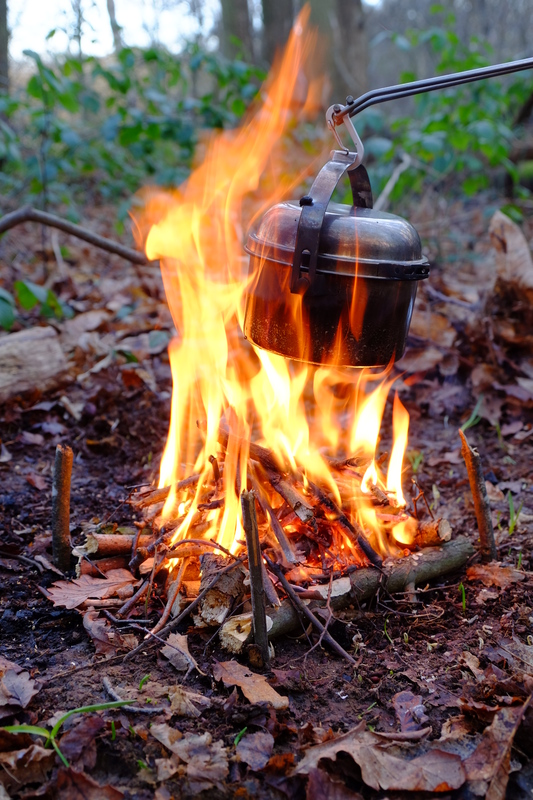
With the tea stewing, the fire starts to die down a bit. At this point if I was cooking something abit more substantial I could feed some more into to keep it going. But if not, just leaving it to burn down at this point, before dowsing it in water when ready to move away would work.

How much fuel did this small fire use? Not much. I used all of the pencil thin pile, half of the finger pile, and a few pieces from the bigger pile.

Tea drunk, we built the fire up a bit in order to cook 2 meals. The same basic size was maintained, but we added a larger log on each side to give it some structure, and piled a few of the thicker logs on. The log on the right of the picture is let over from a previous fire on this site.

All in all this 0.0552m² fire was used to cook a pot of baked beans, a pair of lamb burgers, a jacket potatoe and 1L of chicken stew. As well as a couple of mugs of tea, and a tin of charcloth. It then provided us with a fire to sit by on the chilly (0°C) evening as we enjoyed the woods.

Some times a big fire is the right thing to do. But most of the time a small fire is just the trick. It even comes with the added advantage that you don’t need to collect as much firewood. The only tool I used for the processing of wood on this fire was the Bahco Laplander.


KIT: Stayling Alive Cold Kit

Inspired by Susanne’s Williams thread on making a Staying alive cold kit, I decided to make one of my own. Not wanting to faff about cutting up space blankets, I decided to throw a tiny amount of cash at the problem.

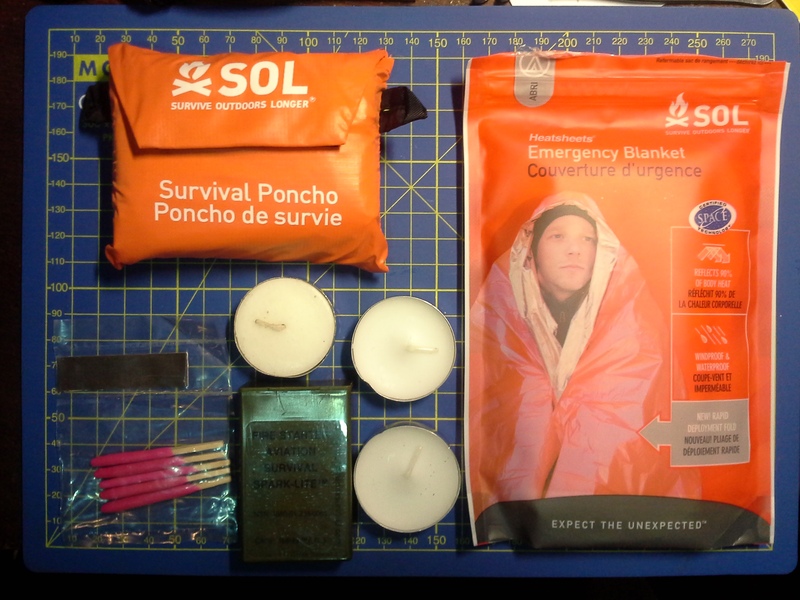
Adventure Medical Kits make a couple of useful items that make a SAC kit really simple. My kit is made up of:

  • AMK Survive Outdoors Longer Survival Poncho
  • AMK SOL Emergency Blanket
  • Storm matches
  • 3 x tea lights
  • NATO Aviators fire kit
  • Alpkit dry bag to store it all.

Staying alive cold kit contents.

I won’t duplicate the content of Suzanne’s thread on how to use a SAC kit, but for those who haven’t read it, the basic idea is something that fits in a pocket when out in winter, whilst providing enough basic shelter and warmth to survive the night. The whole lot was largely used to hit the free postage threshold on amazon.com, and comes in under 20 quid. The only downside, is that the poncho + blanket seem to be of the kind that once unfolded, you will never get them as small and well folded up ever again…

Postscript:

Since I put this kit together I’ve had to use parts of it in anger once. Cycling to the station after college I got too hot, perspired too much, and soaked my base layer. Sitting at the station for 35 minutes in -3°C, I started to chill, so resorted to using the space blanket from my SAC kit to keep myself warm until the train arrived.

Kit: Everyday fire

I’ve mentioned in a couple of recent posts lighting fires with the stuff I have in my pockets, on one occasion because I hadn’t planned on a fire, and another because I wanted to double check that I could. With this in mind I thought I’d write a short post on what I carry with me so I can produce fire when needed.

EDC Fire kit

EDC Fire kit

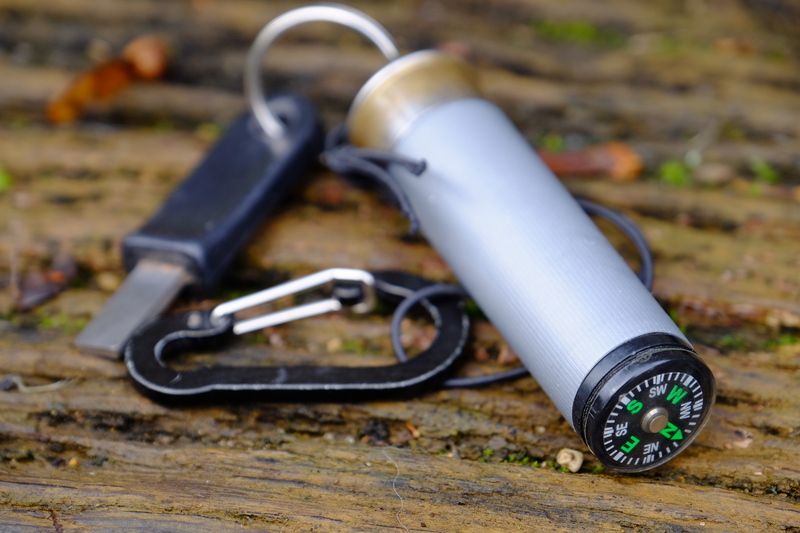
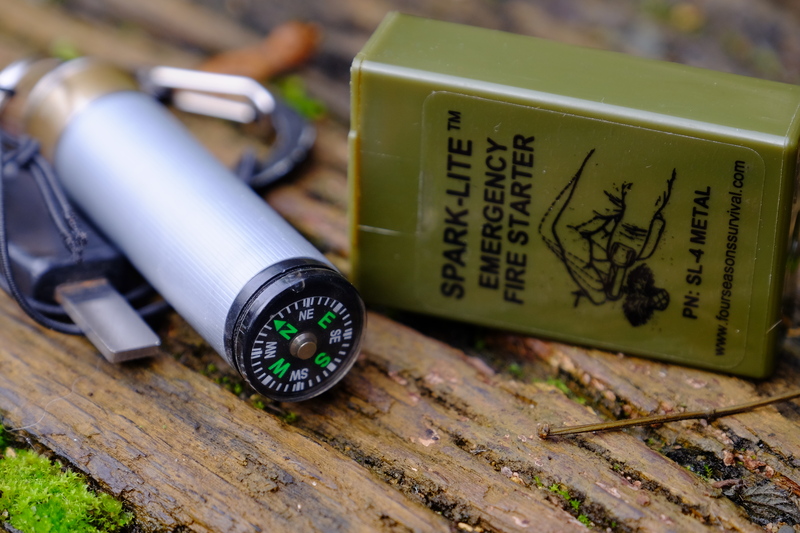
The first item I carry with me started life as an Every Day Carry Fire Kit by Polymath Products. The first version of the EDC fire kit came with a little thermometer on the top, I didn’t expect this to be all that useful to me, so I did a special order with a compass instead. In this respect externally it closer resembles their Ultra Compact Survival Kit.

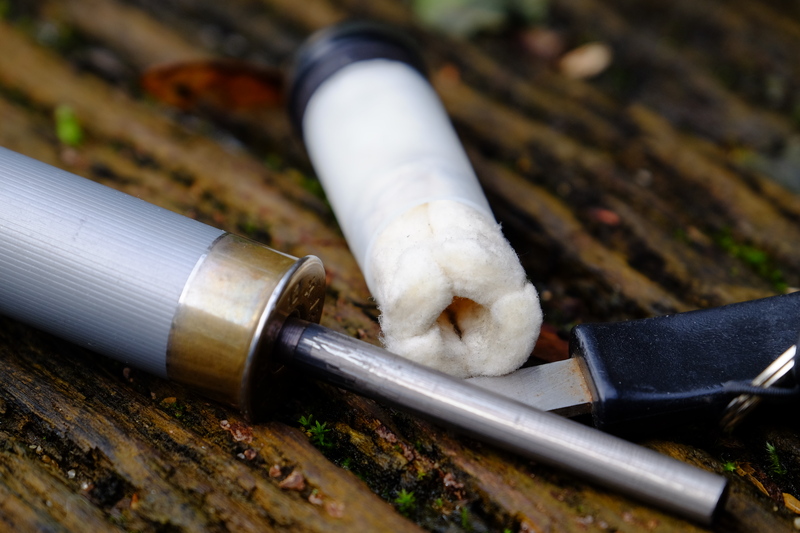
Inside the EDC Fire kit, showing Ferro rod, and Tinder quik tinder.

Inside the EDC Fire kit, showing Ferro rod, and Tinder quik tinder.

Inside the shotgun shell container, there is a ferrocerium rod (aka ferro rod, fire steel etc…), and some tinder. The kit also came with waxed Jute tinder, some pyro powder, and a glow stick. I took these out and replaced them with Tinderquik fire tabs. These are piece of compressed cotton that is treated to make it very flammable, you fluff the end up and they take a spark really easily. I fit 8 of them in the EDC fire kit.

To use the kit you remove the split ring from the hole on the ferro rod, insert the ferro rod into the hole in the shell (the shell then becomes the handle), fluff up a bit of tinder quik, and strike a spark. I really like this kit, the compass has proven very useful even in the urban environment, particularly to orientate myself when exiting tube stations. I’ve even used it to light a BBQ at a friends place.

Contents of the Spark-Lite™ kit

Contents of the Spark-Lite™ kit

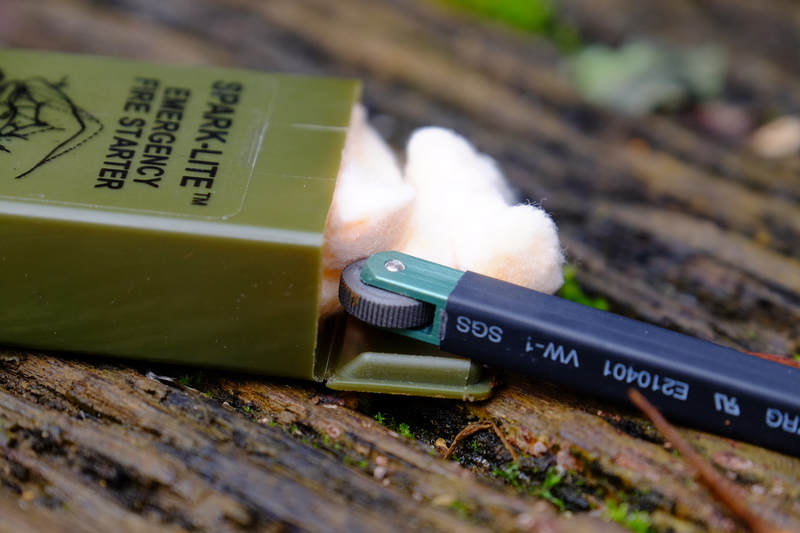
Whilst the EDC fire kit lives in my pocket, I also carry in my backpack something called the Spark-Lite™ emergency fire starter. This is a small green box containing 8 tinder quik fire tabs (spotting a theme here?) and a sparker. There exist 2 basic models of the Spark-Lite™, one has a metal sparker and one a plastic. Of each of these there is a Green and an Orange version. I own both the plastic and the metal version. It’s the metal one that lives in my pack. Aside from the material, the main functional difference between the metal and plastic versions is that the metal version comes with an allen key and a spare piece of ferro rod. The allen key undoes the nut that holds the piece of ferro rod in place.

To use the Spark-Lite™ kit you fluff up one end of the tinder-quik, then using the sparker just like you would a cigarette lighter, strike a spark onto the tinder. The first time I used this the tinder-quik lit off the first spark, which took me by surprised and I dropped it. It’s a really effective tool. As with most kit I use, I have modified it. I suspect that the metal will not be nice to touch in very cold conditions, so have put a piece of heatshrink on the handle to protect my hands. I’m really pleased with how well this set works, and considering that it cost me less than a fiver on ebay, it’s hard to go wrong.

EDC Fire kit and Spark-Lite™ Emergency Fire Starter.

EDC Fire kit and Spark-Lite™ Emergency Fire Starter.

ADVENTURE: Yew must be joking, a #Microadventure in this Wind?

December the 5th. December. I looked at the weather forecast for the weekend. 12°C, It seemed to be a mistake. I checked with another source. The Brits and the Norwegians both agreed. I closed the met office app, and stuffed my summer sleeping bag into my pack along with my usual bivvi gear. I pondered what to do. I wanted a trip out, to be among the trees once more. I’d been craving the forest for weeks. Several times I’d almost gone out, but bottled at the last minute. No this time I must go. But where.
My favourite stomping ground for this sort of trip tends to mean a start from either Wye or Chilham station. From here there are various bits of woodland and downland suitable for a microadventure. I looked at the map again. Back in November I had set out on a 3 day trip involving a 23km loop starting at Wye, and going via Chilham and the Kings wood. I’d done the southern half, but aborted at Chilham after the first night. This seemed like a good opportunity to complete the loop. A simple 12km walk from Chilham station up through the Kings wood to Wye station, bivvying down in a quiet stand of trees somewhere along the way.

Bag packed I left the house with the intention of grabbing some food en route to take with me. An indication of how frazzled my brain was, I hadn’t even got out the end of the road when I’d had to return to the flat twice to collect things I’d forgotten, nothing major, just my sleep mat…

Eight minutes on a train left me standing at Chilham station in a dull grey overcast nothingness. No leaves on the trees, no sun in the sky, not even rain in the air. Just wind. Oh what a wind. The met office had reckoned on 40kph winds with gusts upto 71kph. A bit blustery,
I left the station and headed towards the village of Chilham proper. The wind bit, blowing my hair around, thrashing it against my face. Hat, why hadn’t I brought a hat? Oh yes, 12°C. I put my hood up, hoping to contain my hair, and protect my ears from the windchill. As I walked through the village I now started to overheat. Even with both pit zips wide open it was too warm. I admitted defeat and put the hood down. As long as I kept my orientation into the wind it should be mostly ok.

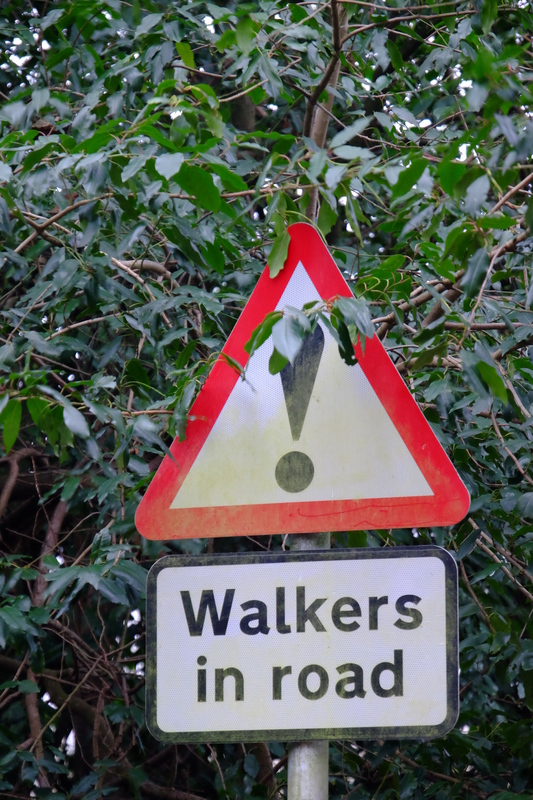
Walkers in Road sign.

Warning to motorists that I was here…

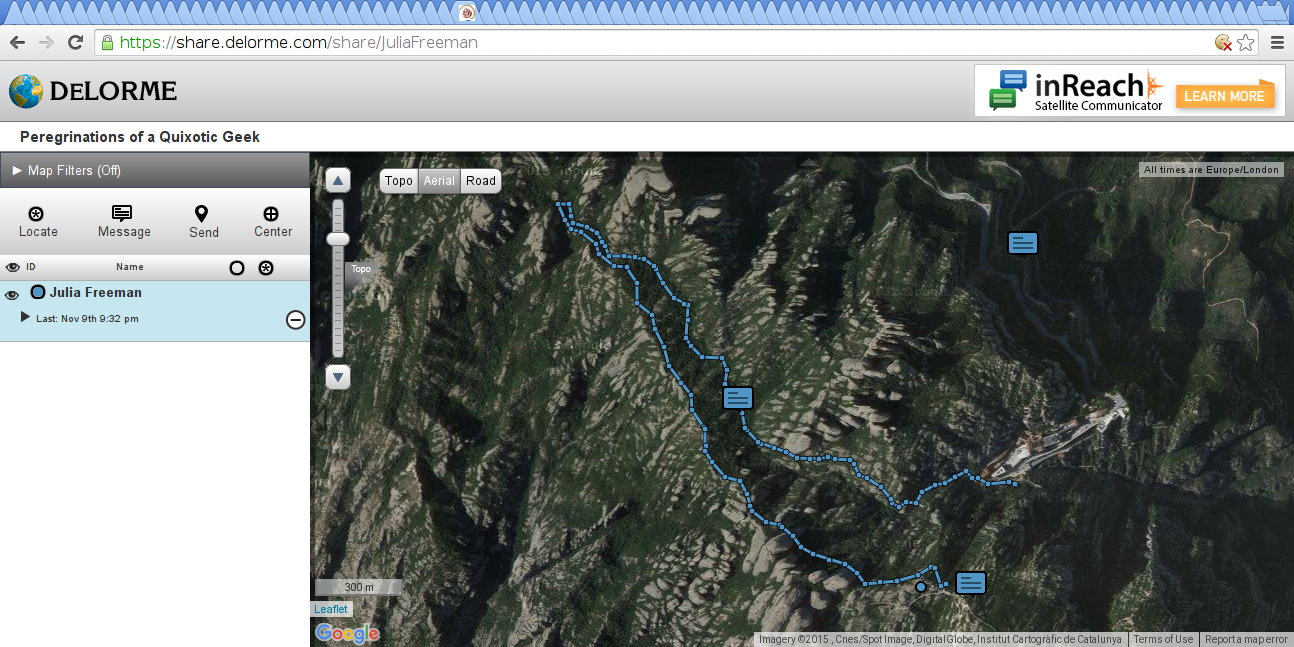
I turned onto the interestingly named Mountain Road. I expected this to be named for a reason, steeply inclined. But no, it was pretty much flat, maybe a gentle undulation. I got 10 yards along the road when the phone rang. This was a surprise, I hadn’t expected to have phone signal here, it’s one of the reasons I got my inReach satellite communicator. It was my dad, who seemed to think I was nuts to be out for a walk in this wind. We chatted as I walked along Mountain Road towards the Kings wood. As I walked I explained how he could login to the delorme website and track where I was, followed by experimenting with the novelty of sending messages to me via a multi billion dollar satellite network…

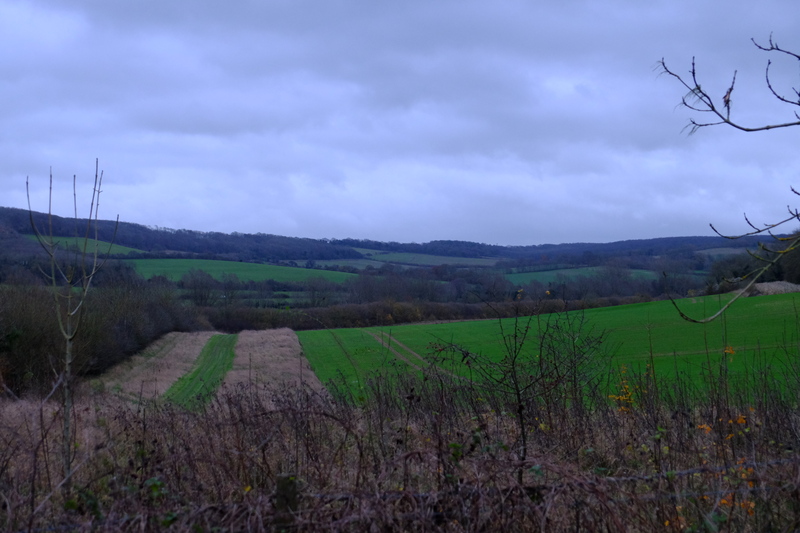
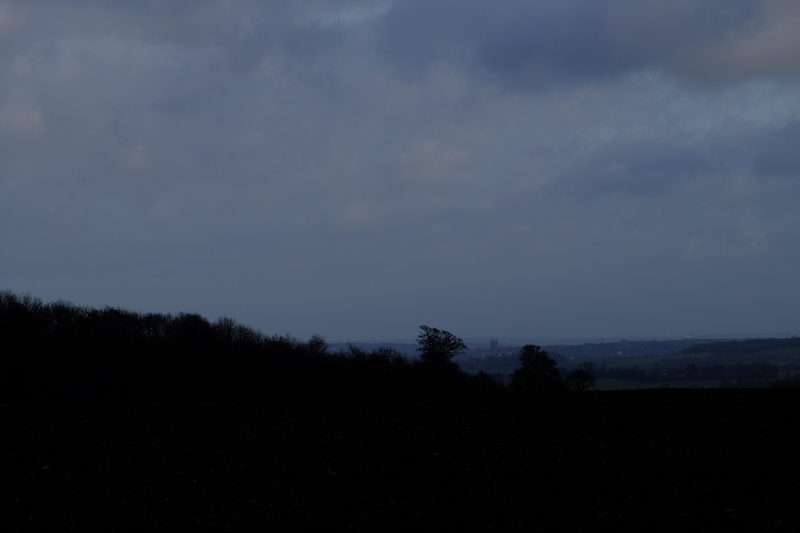
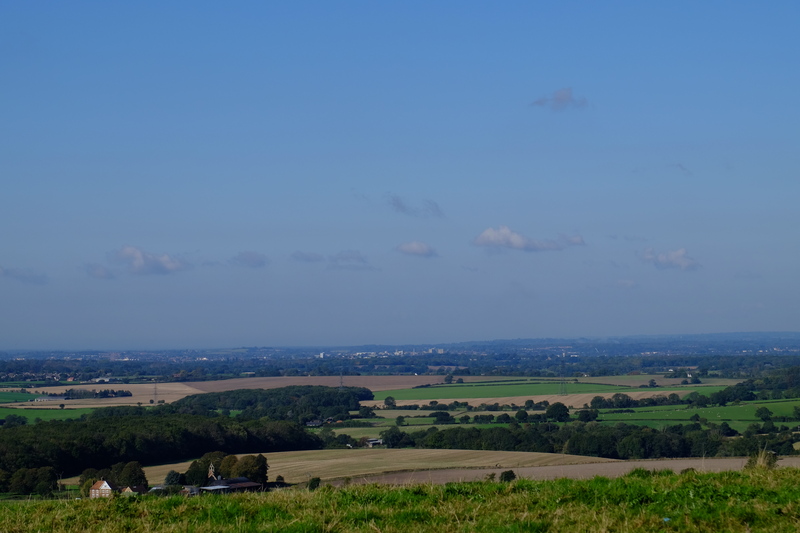
View across the Stour Valley. A month ago we camped in those woods.

As I reached the edge of the Kings wood, we finished the call. It was close to dusk now, and I had what I thought was another 1-2km to go before my intended camp site. I put my head down and plodded up the hill.

I’d left the tarmac’d road behind and this part of the path was a wide trackway. Rutted down the centre where the water had eroded the chalk surface. A month ago in the wet, both myself and the friend I’d been walking with had had traction issues on such exposed chalk. In the rain the chalk is like polished ice and it’s easy to fall over. Thankfully today the chalk was dry, even so I plodded up the hill carefully.

I’d brought with me a new toy, a wood burning stove. So as I wandered I kept an eye out for wood to burn. I had my usual fire kit with me, but beyond few basic tinder tabs (more on that in future post), I didn’t have anything else suitable for making fire. I would have to put my Bushcraft skills to use if I was going to have a fire tonight. As I walked I looked for some fallen birch, the bark of which makes great tinder. It didn’t take me long to spot a dead fallen Silver Birch (Betula pendula). I cut off a 18″ long length, then tried to work out how best to carry it. Taking my pack off would be a faff and I already had a walking pole in each hand. I settled on holding it under the waist belt of my pack. A few yards further on, I added a second piece of Birch to the belt. This should hopefully be enough to get me sorted. I continued up the hill.

I had brought a map with me, intending to rely on it alone, without resorting to my phone or GPS. I need to improve my navigation skills. But with dark almost complete, I chose discretion as the better part of valour, and pulled out Viewranger on my phone. As I homed in on my intended campsite for the night, I grabbed a couple more bits of dead standing to fuel the fire. Fifty meters short of the camp, I turned right off the path towards a stand of Yew trees. In the dark I discovered that what looked to be a direct walk to the Yews, was interrupted by a three meter wide ditch. The sides where steep. It must have taken me 5 minutes to slowly easy my way down the side of the ditch. Using my poles almost like ice axes. Fortunately the other side of the ditch was easier to climb up. A few more meters and I was there. Camp.

I’d spotted this stand of Yew trees on a walk earlier in the year, and thought they would be a nice spot to bivvi. What I hadn’t quite taken into account was how not flat they were. I put my pack down with my little pile of fire wood, and sat down. Breathe. I needed to find a flat spot big enough to roll out my bivvi bag without any dead branches above it that could fall in the night. I scouted around looking for a perfect spot. I couldn’t spot anything ideal in the near darkness, and I didn’t want to shine my torches main beam around too much. I try not to draw too much attention to myself when in the woods, and was using the red beam on my headlight. I found something that looked pretty flat in the dim light, it didn’t have any over hanging dead branches. It would do. I moved my pack up here along with my firewood bundle.

Before I make camp a habit of mine is to just sit and listen to the woods, get used to the area I’m in. I listened. The woods were a cacophony of noise. Branches banged, trunks squeaked, and it all set on a base line of white noise from the wind. A gust of wind shook the trees, and I felt a footstep. Adrenaline shot through my body. I was on high alert. I turned off my torch and listened. I couldn’t hear anybody to connect with the footstep. Another gust of wind, another footstep. I looked around. Sheer terror the only way to describe it. I didn’t feel alone, something didn’t feel right. I reached out to touch the nearest tree, and on the next gust, I felt the tree trembled, the vibration propagating through the soil. There was noone here, the wind was making the ground shake. Breathe.

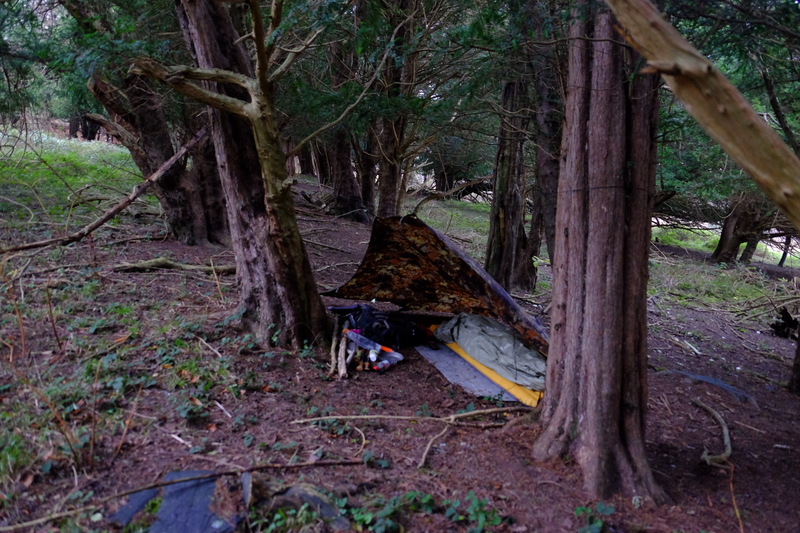
As soon as I had my heart rate under control I decided to pitch my tarp, this would give me some shelter from the wind, some visual shelter from anyone mad enough to be walking the woods in these conditions, and would give me some sense of security. Here is where I discovered the slight downside of my chosen pitch. The trees didn’t lend themselves to a proper pitch. I thought about the options, I played them through in my mind, before deciding on pitching my tarp with the ridge along the short axis, in an open sided lean to. There wouldn’t be much room, the gap  between the trees on this axis was barely more than the width of the tarp, but if would do.

I ended up with a ridge line in a triangular config round three trees with the tarp in a sort of open sided lean to arrangement. It wasn’t perfect, but it would do to get me going. I sat under the tarp slightly out of the wind and thought what to do next. Fire.

I took the various bits of dead standing and birch bark I’d collected, and with my little folding saw processed it down until I had a pile of sticks varying in thickness from a couple of millimetres, upto thumb size. I filled the stove with sticks of various sizes, packed in some birch bark and added a lit tinder quik tab. At first I didn’t think it had caught, I was just about to light another when the flames started to grow. Success. I spent the next half hour feeding sticks into the fire, bathing in it’s warmth and glow. Alas when I looked away for a couple of minutes to make a sandwich, it seemed to die down and I needed to start again to get it going. It worked. Twice in one night. I fed twigs into the stove and nibbled on my dinner.

The wind was showing no signs of easing up and the tarp pitched the way it was, wasn’t giving me as much protection as I had hoped. I’d need to reconfigure it. I let the fire die down, and turned my eye to the shelter. In the end I dropped it down into a half open pyramid type lean to type setup. I lay down inside the shelter. The fabric of the tarp was just inches above my face. Hardly optimal. I was exhausted, it would have to do. I rolled out my bivvi bag, inflated my sleep mat, and crawled into my sleeping bag.

Various layers of heavily distilled essence of dinosaur stood between me and the elements. Gust after gust blew through the trees, with each a crescendo of white noise filled the air. Trees groaned, branches squeaked, the ground shook. Every so often the staccato crack of a branch giving way would break through the noise. I lay in my bivvi bag, nose inches from the tarp, my locator beacon clutched to my chest, listening. I have never been more terrified on a night out in the woods. Even when visited by wild boar and strange dogs.

Just as I started to drift off towards sleep, a gust picked up the corner of my tarp and blew it loose of it’s peg. I couldn’t leave it to flap in the wind all night, I’d have to leave the psychological safety of my cocoon. I took the opportunity to re do the pitch of the tarp so that it was slightly further down the ridge line, meaning that I was no longer falling out from the lower edge. I also took the opportunity to rig up a stick to try and lift the tarp off my face a bit. I crawled back into my bivvi bag and tried to sleep.

Not the best pitch I’ve ever done, but it protected me for the night.

I slept the fitful sleep of the hounded, every so often a large gust would shake the whole tarp, waking me up. Throughout the night the wind moved around so occasionally it blew into the front of the shelter, billowing it out like a parachute, at others it blew onto the lower angle, pinning the fabric against my body.

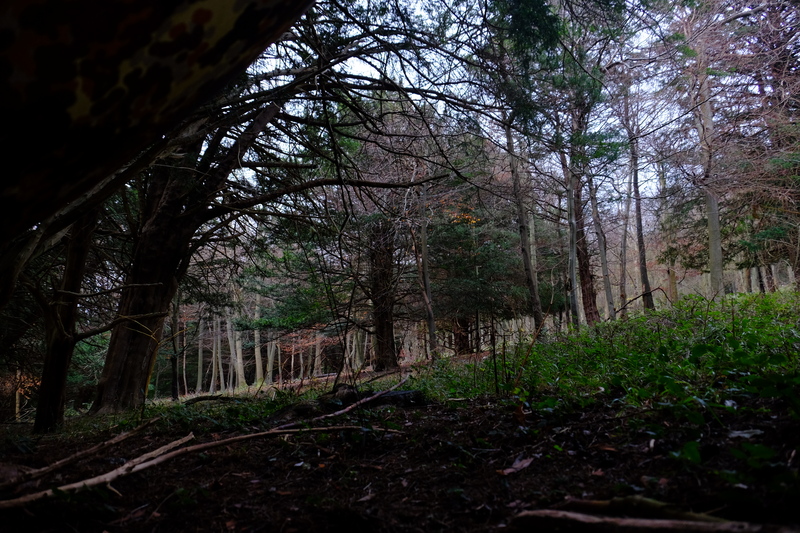
The view from my bivvi bag.

0700 came bringing with it my alarm. It was still dark, the wind still blew. I hit snooze. A grey dawn slowly broke across the forest. I hadn’t exactly slept well, and in my groggy state I hit snooze three more times. By 0900 my bladder was telling me it was time to get up, I was just about to hit snooze one more time when I heard the first drops of rain on the tarp. Sod it, time to move.

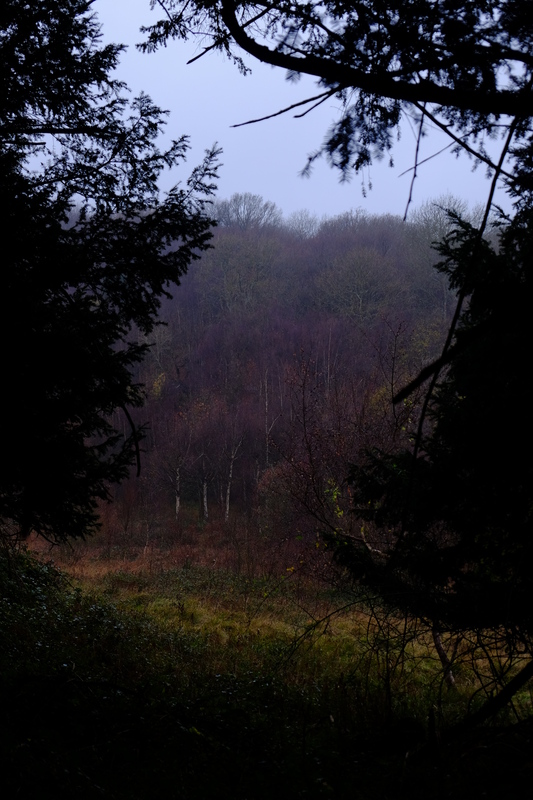
Venturing forth from my warm sleeping bag, I stood up and stretched. Looking out through the trees, I could see drizzle being blown by the wind. Sheltered in the stand of Yew trees, I hadn’t noticed this.

Drizzle.

Drizzle

I broke camp in a matter of minutes. Using a 60L pack rather than my usual 30L meant I didn’t need the usual faff of cramming everything into small stuff sacks. It certainly sped up breaking camp. I shouldered my pack looked around to check I hadn’t left anything, then looked out of the trees into a clearing. Everything was blurry. Glasses. I swore. Loudly. My glasses were in the little zip pocket on my sleeping bag… in the bottom of my backpack, underneath everything else. I unpacked, found my glasses bent them back to the shape they should be, and repacked everything. Grrr.

Knowing of the ditch I had traversed in the dark the previous night, I took a slightly different route back to the path, this one was more direct, but steeper. As I did I found a couple of game trails, one of which had a mound covered in deer scat. I continued up the hill past mounds of white chalk. From a distance I wondered what they were, but as I got closer I realised they were the spoils from a badger set. I didn’t see any prints or scats from the badgers, but their excavations were visible throughout the rest of the day.

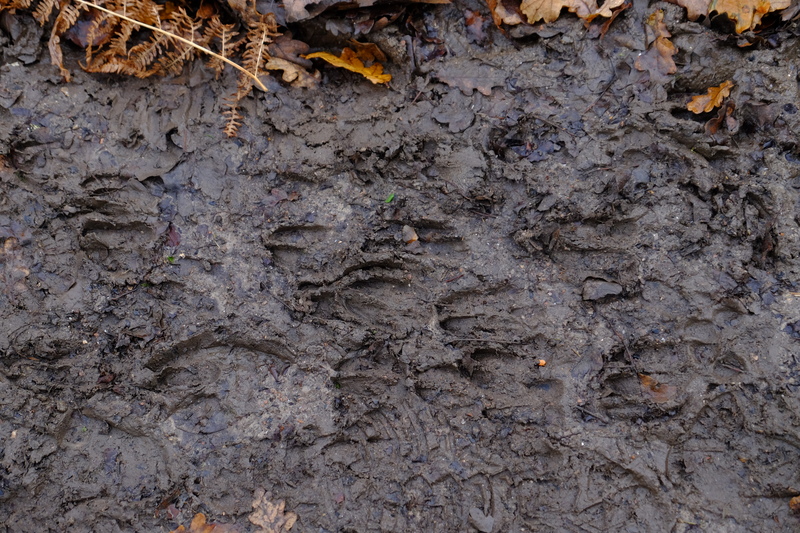
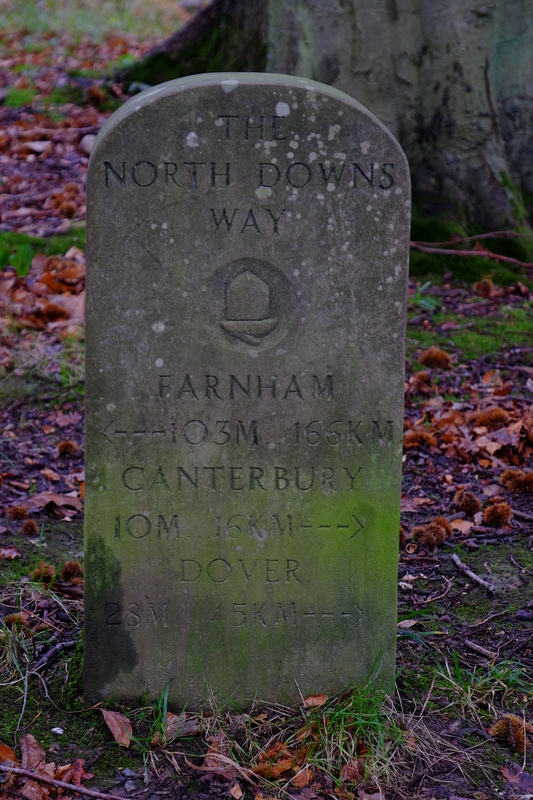
I rejoined the North Downs way and headed west for Wye. The path here was the best I’ve had on the North Downs Way so far, wide, and of a sort of compacted grit that made relatively easy going. In places the grit gave way to mud, and in this mud the hoof prints of deer stood out beautifully. Nearly every patch of mud I passed had clear deer sign in it.

Deer sign.

I continued on for Wye. At one point I passed a information board and stopped to read it. The board explained that this was the first point on the Pilgrims way where you can see Canterbury Cathedral. Walking in the opposite direction, I never would have thought to look for it.

Canterbury Cathedral

Canterbury Cathedral

At the edge of the Kings wood the North Downs way hangs a left and heads down hill to Boughten-Lees, where it diverges, to either Wye or Farnham (eventually). Alas the sign saying this is missing at this point. I climbed over a stile into a field expecting a path to my left. No path. I pulled the map out and studied it. I’d gone wrong. I climbed back over the stile and retraced my steps 20 yards to a junction. Yep, this is it, or at least this is where the sign should be. I headed downhill.

The wide compacted grit path of the last 4km was replaced by eroded and polished chalk as I descended towards Wye. As I went I started to think about my route. By now my feet were more sore than they should be and I started to wonder if there was a shorter route to Wye. I looked a the map, and there seemed to be a path across fields that came out near the station. Deciding once again that discretion was the way forward. I left the North Downs Way, and headed across the relatively flat farmland. Out of the protection of the woods or hedgerows, here I got the full brunt of the wind and once again pulled my hood up to keep my ears and neck warm.

Crossing the Canterbury Road, I had just 2km to go to get to Wye. Alas the fields here are the flood plane of the River Stour, and the recent rain had water logged the soil. Large areas of the path where nothing more than bog that I gingerly stepped through, thinking carefully before placing each step. Twice the mud tried to steal my shoes. When not outright bog, the path was in places a polished clay that led to slipping and sliding. Fortunately I stayed on my feet.

Eventually with sore feet and aching legs I reached Wye,. I hobbled into the Tickled Trout for a well earned Roast Dinner and a pint of Ale.

Mile stone.


REVIEW: DeLorme inReach Explorer

“I’m off for a hike, back at 5”

It’s a phrase I’ve uttered a variant of many times, be it to my house mate, or via text to another friend. Each time it’s a clear message. If you haven’t heard from me by 6, call 999 and ask for search and rescue. I usually accompany it with a brief explanation of my plan “I’m going to walk in the Kings wood” or on bigger walks I may leave a GPX of the route with them.

The reason for this procedure is that often in the areas I hike in, there is no phone signal. Even in somewhere as densely populated as Kent phone signal is not a given. Alas as a procedure, it’s not perfect. If my walk started at noon, and I fell over and broke my leg at 1, it’s going to be 5 hours before the call is made, and another hour or 2 before rescue will get to me. That’s a long time to lay in pain on a hill side. In such situations a broken leg can easily become complicated by things like hypothermia.

I experimented with the Buddy beacon on the Viewranger app, which provided some tracking of my position while hiking, but it was always let down by a poor mobile phone coverage and even poorer battery life. There had to be a better way.

Enter the DeLorme inReach range of devices. These devices work not off the mobile phone network, but off the Iridium satellite network. Iridium was launched in the closing years of the 20th century as a satellite mobile network for global use. The history of the bust and bailout of Iridium could fill an article in it’s own right, so I won’t go into that, you can have a look on wikipedia, it’s an interesting story that’s worth a read.

The original inReach provided SOS and 2-way messaging functions, but relied on pairing with a mobile phone to provide full messaging functionality. But the leap forward comes with the Explorer and the SE devices.

The inReach SE and the inReach Explorer have the same basic form factor, a bit like a ruggedised older style mobile phone, with the antenna sticking up on it. Both devices share the SOS, two way messaging, social media messaging (send only) and position tracking. To this the explorer adds traditional GPSr functionality, with way points, positioning, Barometric altimeter, electronic compass, route management etc… The price difference between the two units is about £50. Or the same as a very low end GPS like the Garmin eTrex 10.

I’ve wanted a device like this since I first followed the launch of Iridium back in the last century, but when I saw the price of both the devices and the connectivity contracts I concluded that it would be forever beyond my reach. Fast forward by 17 years, and things have changed a bit. Iridium devices are still much the same price, and usage is much the same cost. Only inflation means that relatively speaking the price has come down a lot. But along with the improvements in cost effectiveness, so have come improvements in devices that can use the network. I was amazed to discover that you can buy a device like the inReach Explorer for less than the price of a middle of the range smart phone. But more importantly the usage prices have come down dramatically. I’ll go into this in more detail shortly.

In July I treated myself to an inReach Explorer, and signed up to the Recreation plan on a 1 year contract. The device arrived by FEDEX less than 24 hours after I placed the order. It comes in a box with a charger (US socket), USB cable, lanyard, and manual. I also bought the case to go with it. The device itself is waterproof to 1M, but does not float. I want to be able to use it while Kayaking/Canoing and so bought the extra case. In High Visibility Orange, it both floats, and should be pretty obvious if I do drop it in the drink.

When you get the device you first have to charge it up, then activate it. In order to activate it you need to decide what usage plan you want to use. DeLorme offer 4 levels of usage plan for individuals, and you can choose an annual or monthly contract. If you opt for a monthly contract, you can choose to not pay anything for the months of the year you don’t need it. So if you only tend to hike in the summer months, or only want to use the device on certain trips, you only pay for the months you need. Conversely, if you expect to use the device regularly, then the annual contract works out cheaper per month. The four plans range from the “Safety Plan” at $14.95 per month ($11.95 per month if you have an annual contract) to the “Extreme Plan” at $99.95 ($79.95 per month with an annual contract). At $11.95, you get unlimited SOS, 10 text messages, unlimited preset messages, and a minimum tracking interval of 10 minutes. Tracking points and location pings are $0.10 each, and if you go over your 10 messages they are $0.50 each. The next plan up, the “Recreation Plan” is $24.95/$34.95 per month, and perhaps the most useful of the plans. Here you get 40 text messages, unlimited tracking and location pings. Above this plan the price jumps significantly and gives you unlimited messaging. Then for the top level plan, it increase the tracking frequency to 2 minutes.

What are preset messages? These are upto 3 messages you pre-program into the device. You have to decide both the recipient and the message content. I’ve got these programmed to “I’m OK” “Made camp” “Breaking Camp”, and they go to a couple of friends. You can send preset messages either from the preset menu in the device, or by holding down X button until it gives you the menu. Each preset message when it is delivered to the recipient includes your position as both a link to a map with a “they are here” indicator, and as a lat/long position. Being included with all plans these are a really useful way of keeping friends and family up to date with your status.

What are tracking points and location pings? If you go into the tracking menu you can activate the inReach device to relay your position via satellite every x minutes, where x is the interval you choose. This is limited to a max frequency of 10 minutes or 2 minutes depending on plan, but you can also set it to be less frequent, once an hour say. These tracking points are sent to DeLorme and can be shown on the mapshare system. Mapshare is DeLormes platform for sharing your position. You can share this with friends/family so they can track your progress, they can also use this to message/ping you. This is where location pings come in. Someone with access to your Mapshare page can ping your device to see where you are. It’s like a tracking point, but pulled, rather than pushed…

When a message arrives via text, it looks something like this (Note link doesn’t work, and position is made up, just here for example purposes)

“I’m OK. http://dlor.me/ABCDEFGH 51.12345 0.9876”

This allows the recipient to look on the website and see where you are. Those you give Mapshare access to can also send you text messages. The receiving of these messages come out of your allowance, or cost you $0.50 if you have used all your included messages.

The Mapshare interface

The Mapshare interface – Locate (ping the device), Message (send a message to the device), Send (send a position to the device), Centre (centre the map view on the device’s position)

You’ve charged the device, you’ve entered your card details and started the activation process. At some point you’ll be told to go outside and give the inReach a clear view of the sky so that activation messages can be sent. This also gives you an early indication of the limitations of the device. You need a clear view of the sky. You can’t send messages from indoors, and even a thick tree cover can stump it. Vehicle use seems to be variable. In a car I’ve not had issue, but when I’ve tried on a train, it’s been temperamental, that said the message was sent eventually…

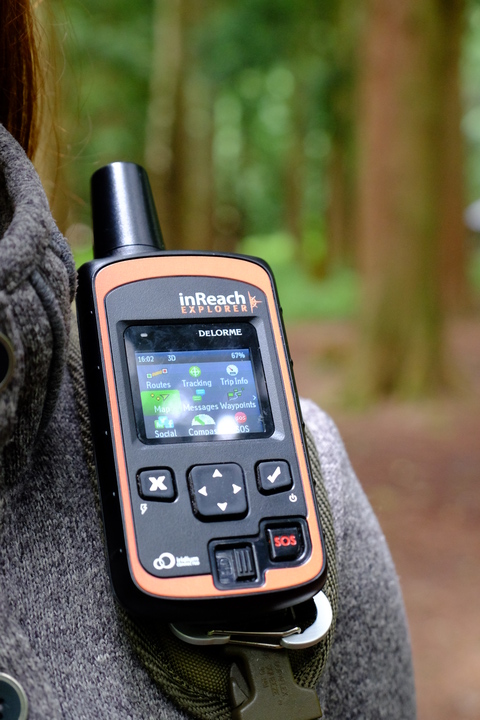
Device activated it’s time to use it. If you’re using the tracking functionality or want to be able to receive messages, you need to make sure the device is somewhere it can “see” the satellites. This means not in a trouser pocket… I carry the device on the left shoulder strap of my pack. It comes with a belt clip that allows attachment of the device. This clip has a rather aggressive barb on the end which makes it a pain to get on and off, but at the same time does reassure you that it’s going nowhere. I back up the clip with the lanyard, which I have carabinered to my pack strap as well.

The Delorme Inreach Explorer mounted on the shoulder strap of my backpack.

The DeLorme inReach Explorer mounted on the shoulder strap of my backpack.

The difference between the inReach Explorer and the inReach SE, is that with the explorer you get normal GPSr functionality included. This means that when tracking, as well as just sending your position, it also allows you to log the position locally. This local logging has the advantage that it doesn’t use tracking points (if your plan doesn’t have these for included), and can be done at a higher frequency than you can transmit. If you opt for a logging frequency of higher than once per minute you will get a message telling you that this will result in the GPS receiver being always on and will increase battery usage. For this reason I have my logging interval set to 1 minute, and my tracking interval set to 10 minutes. You can download the GPX trace to your computer when you sync the device (more on that shortly).

This GPSr functionality includes a Barometric altimeter and an electronic compass. Due to the peculiarities of how the GPS system is designed, accuracy of altitude position (z axis) is lower than your position on the x and y axis. This means that you can’t normally rely on having a GPS for altitude positioning. Having an altimeter is a really nice touch to the Explorer, it’s useful when you want to follow a set contour round a hill for example. The electronic compass is not a replacement for a normal compass when used with a map, the shape of the device means you can’t easily use it as a baseplate compass to get a bearing from a map, where it does come in useful is when you know that the next way point is on a bearing of 097°, you can hold the device in front of you and rotate until you are pointing the right way.

In compass mode on a map.

Device in compass mode to align the map.

Messaging on the inReach is it’s key feature, and one it does well. Typing messages is not the easiest interface ever used. Text entry when you don’t have a full keyboard is never going to be great. If you’ve used a normal GPS before you’ll be familiar with the cludgyness of their text input. DeLorme try to simplify this via a predictive text mechanism. This isn’t perfect, but it’s better than nothing, the main limitation is that the dictionary is American English and perhaps favours words more suited to an American hunter than a British hiker, I’ve also not worked out how to add words to it’s dictionary. There are mechanisms within the device to make things a bit simpler. You can pre program some messages that are common ones to type. “Yes” “No” “I’m running late” “It’s all uphill” “Weathers here, wish you were nice” etc… These don’t count as preset messages so they are charged either out of out allowance or at $0.50, but it does make it a bit easier to type. The other option you have is to pair the device with your phone and use the keyboard functionality that provides to type the messages.

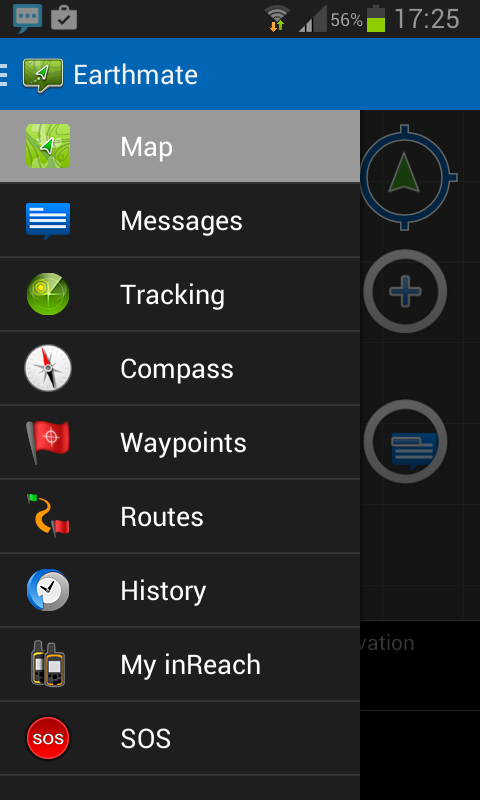
Functions available via the Earthmate app

Functions available via the Earthmate app

Pairing the inReach with the Earthmate app on your phone gives you the ability to use all the inReach’s functions with the additional ability to download maps to your phone and use those with device’s GPSr functionality. I’ve not really used the app much, I tried it on a trip to Monserrat, and upon closing the app, it kept my phone from sleeping, and drained the battery. With the latest version of the firmware for the inReach explorer DeLorme introduced what they call “wireless sync”. This upgrade is advertised as allowing you to use your phone to sync your inReach’s messages and contacts. In the process of writing this review, I synced my inReach via the Earthmate app, and was surprised to find that it had also uploaded the logged track info to the website, meaning I could log in to the DeLorme website, view the detailed trace, and download it. This was a surprise to me, and the first draft of this review had a rant about how you can’t get a GPX out of the device without using the Windows or Mac based sync. Perhaps it would be better instead to grumble about poor communication of the additional features in the upgrade by DeLorme… You still can’t sync the firmware via the Earthmate app, for that you do still need either a Windows PC or a Mac, but seeing as firmware upgrades are something you only have to do rarely, it’s not a show stopper. I have enough friends that do have Windows or Mac laptops that will let me borrow them to update the firmware, that I can manage.

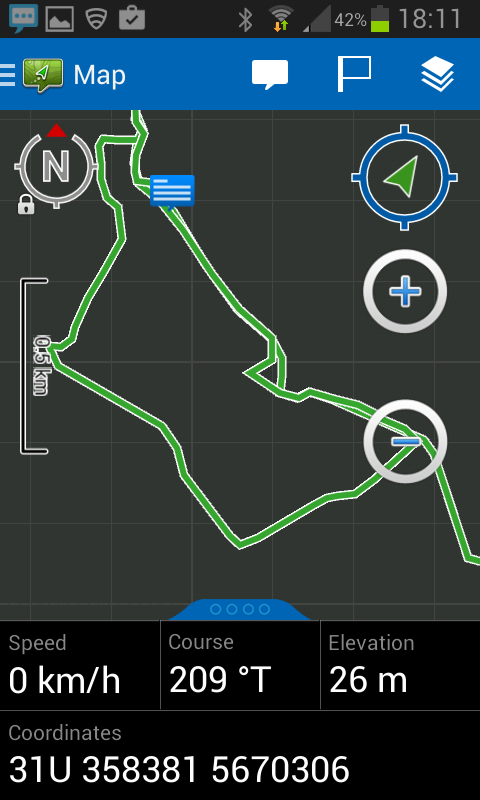
When I read the email announcing that wireless sync was now supported in the Earthmate app, I got my hopes up that perhaps I could download the GPX from the inReach to my phone. Alas, no such luck. It would be nice to be able to download the logged track info out of the device without relying on Internet connectivity to do so. Earthmate might be able to upload the track to DeLorme for you to view via the website, but you can’t just download it to your phone, to back it up. This is a major failing of the app. Given the limited space in the device for logging your track, the ability to download it to your phone periodically would be great a really useful feature.

Earthmate app showing the route trace.

Earthmate app showing the route trace.

The other significant messaging feature of the inReach is under the menu item “Social”. This allows you to post messages via satellite to Facebook, Twitter, and Mapshare. You have to configure access for DeLorme to do this via the same website you configure the rest of the inReach’s functionality and payment info, but once setup, you can use the social menu to post to these Social networks. I don’t have a Facebook account so haven’t tested that, but I’ve used it to tweet frequently. There is something rather amusing about laying in a bivvi bag on a mountain side in Spain and using a multi billion dollar satellite network to tweet about what it is I had for breakfast… One of the settings when you configure social media connectivity is position info. You can set it to include your position info, or a link to your mapshare page in your tweets or facebook posts, the same as it does in your texts. I have this disabled, I don’t want twitter knowing where exactly I am laying in a bivvi bag in the woods.

The final major feature of the inReach Explorer, and perhaps for many the main reason you buy the device, is the SOS functionality. You can activate this three ways, via the Eearthmate app, the SOS menu option, or by sliding the switch on the face of the device then holding the SOS button for 5 seconds. For obvious reasons, I’ve not actually tested this feature, and I hope I never have to. I’m assured by DeLorme, that as long as I slide the switch and press the SOS button for 5 seconds someone will come to help me. Even if I then lose consciousness. I have to go on trust that this will happen. It’s a leap of faith. Press button receive-helicopter. In theory if you are still conscious, having activated the SOS call, you can then communicate with the rescuers with info such as what injuries you have, number of casualties etc… I’ve not tested this… Tho I wouldn’t like to have to type out details of a thoracic spinal injury under stressful conditions using the standard text input mechanism.

One of the questions that I have been asked by a lot of people who have first asked “What’s that device on your shoulder?” is “Who pays for that?”. Again it’s not something I’ve managed to get a clear answer to. In the UK, last I checked a Mountain Rescue callout isn’t followed up by an invoice. Nor do the local HART team request your card before evacuating you to hospital. But this isn’t the case everywhere. For many activities travel insurance covers some of these costs. But if you are at all worried, DeLorme offer a $17.95 a year policy covering you for upto $100000 of SAR costs. I’ve not opted for this while I’m wandering around in western Europe, but if I venture further afield I will seriously consider it.

So far I’ve used the DeLorme inReach Explorer in Britain, Spain, France, Germany, Luxembourg, Belgium and The Netherlands. It’s worked great for messaging friends, tracking my position, posting to twitter, and GPSr functionality. The $24.95 a month comes out at about £16 with the exchange rate, which is less than many pay on mobile phone coverage. I’ve yet to exceed the 40 messages per month, and have transmitted over 260 tracking points. I love the inReach Explorer and it’s become a permanent fixture to the left shoulder strap of my pack.

Postscript.

If you have found this article of use and are considering buying a DeLorme inReach, be it the Explorer or the SE, please do so by clicking on these links – DeLorme inReach Explorer, DeLorme inReach SE. It helps pay for the running of this site and the adventures that it is based upon.

ADVENTURE: Wye yes! (Section hike the North Downs Way pt 2)

Back in February I started off an attempt to section hike the North Downs Way (NDW). It didn’t go well. I managed less than 10km before the foot injury forced me to accept an offer of rescue from a friend. Since then I’ve had several more appointments with a podiatrist. The product of this was a pain of made to my feet insoles. And they worked, I could walk without the pain.

Thursday night I found myself angry and upset. I needed to get out, I needed to do something to clear my mind. As I crawled into bed an idea formed, if I got up early, I could go for a walk. I set my alarm for 0600 and curled up with a plan forming in my head.

0600 in October is still dark, yet I crawled out of bed with enthusiasm. By 0630 I had packed a minimal day pack – map (OS explorer 137), battery pack for phone, emergency blanket, satellite beacon, and water filter. If I was going to stand a chance of doing this I was going to have to travel light. 1.39kg before I added lunch. Stepping out into the inky dark, I was greeted by I crisp Kent morning. A tiny sliver of moon hung in the sky. This felt good. I nipped to a cafe for a fried breakfast, followed by supermarket to pick up lunch, then headed to the bus station for the 0825 number 17 bus to New Barn Corner.

As I watched the Elham valley slip by the window of the bus I pondered what lay ahead of me – get off bus, walk 500m toward Postling, pick up the NDW, hang a right, follow the signs 15km to Wye, get train home. Nice and simple.

The clear crisp night have given way to a beautiful sunny day. I crossed the road and wander towards the NDW, everything felt great.

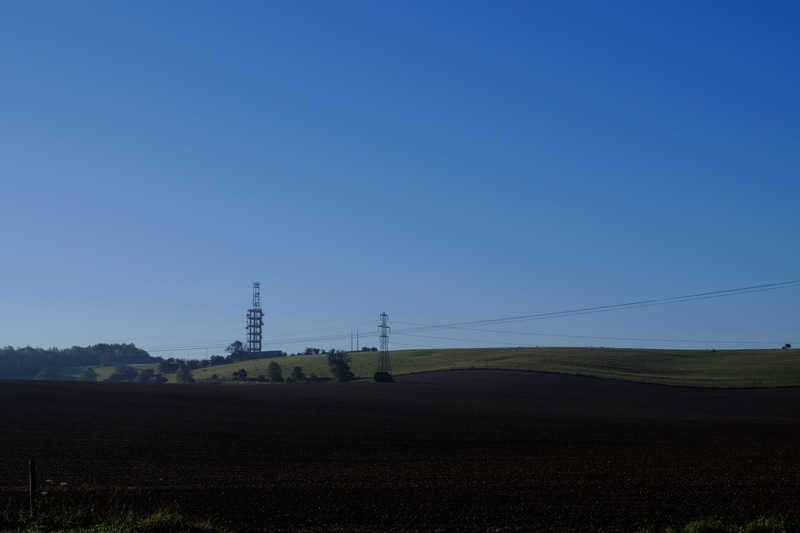
Etchinghill Transmitter

Etchinghill Transmitter – The NDW passes this transmitter mast on the way from Dover.

To save weight I’d only brought one of the two maps covering the days walk, the second half. In hindsight I should have brought the other one instead, and at the first NDW sign I made my first mistake. The sign seemed to point along the road, guessing it took the road a couple of hundred meters before it crossed the hedge, I wandered down the road. The NDW actually went the other side of the hedge, along the edge of the field. I followed the road into Postling village, where I took a footpath north to at last join the North Downs Way. I stopped to shed the fleece from under my windproof, it was too warm for that, and paused to take photos every for dozen yards. I made slow progress, but didn’t care, beautiful weather, and beautiful scenery. At some point I dropped my lens cap, and retraced my step a couple of hundred metres to find it. Plodding on I passed from the access land full of cows near Postling to fields. Passing through the kissing gate I looked for a NDW sign. Nothing, there was a footpath sign pointing north, but an obviously well trodden path continuing west. I took the unsigned path, hoping I’d find some indication soon.

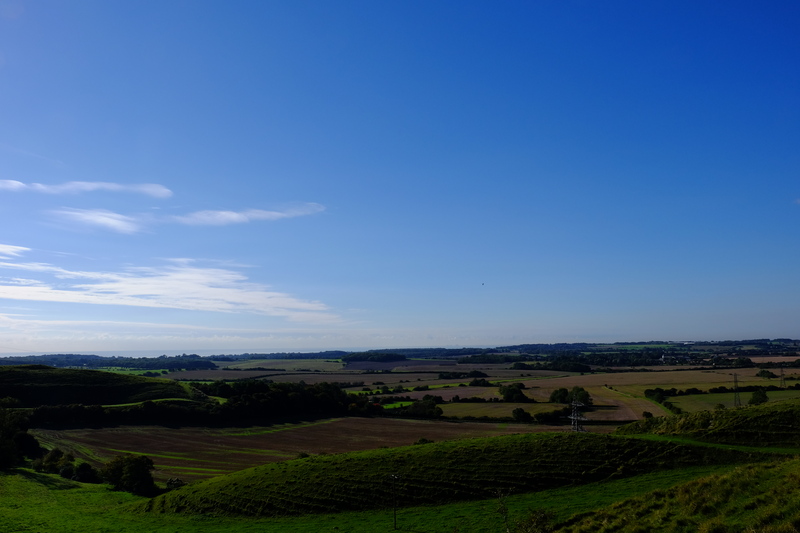
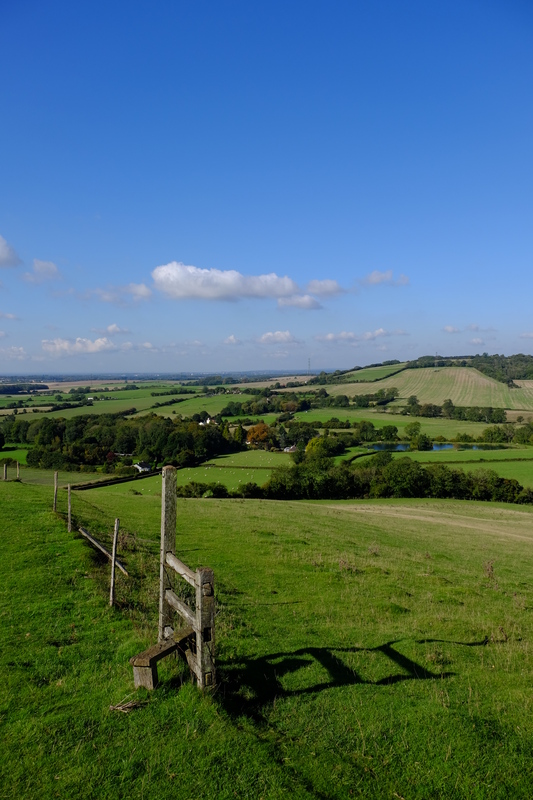
View from Postling Downs.

View from Postling Downs

Following the path I eventually picked up signs for the NDW, and crossed Farthing common. Dodging traffic I crossed the main road into a field, I decided it was I good time for a first drink stop, and sat admiring the view while listening to the rattle of small arms fire from the nearby MOD training range. When I first attempted the NDW back in February, something that struck me was how at no point did I get away from the sound of the A20. Yet this leg, despite paralleling the M20 for a good distance, the only time I knew it was there was when I looked hard, and got the occasional flash of sun light reflecting off a lorry.

Ashford in the distance.

Ashford in the distance.

Break over, I continued north, parallel to the road until it turned left in the corner of a field and headed west again. Here the scenery changed from rough pasture and arable fields to a rolling hills of finer pasture, betwixt the quaint villages of middle England. I descended Cob hill to the village of Stowting, where the NDW moved from footpath to country lane. The black top would last a couple of kilometres before picking up a green lane along the top of Braebourne Downs. During this length the distance between NDW signs was greater than previous, just far enough for you to start to wonder if you’ve gone past the turning. On the road I asked a local for directions, who reassured me I was on the right route and to keep going. Alas this didn’t stop me taking a turn slightly too early, and having to back track. This added almost a kilometre to my walk.

The descent of Cob hill

The descent of Cob hill

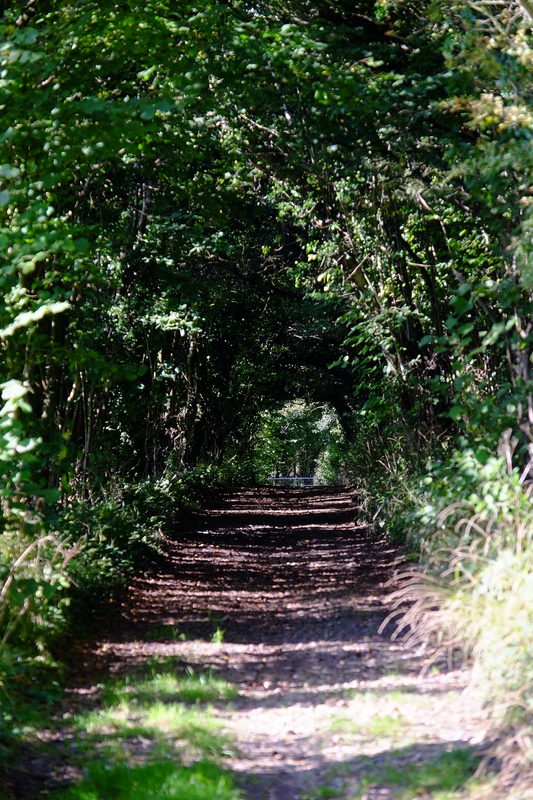
Eventually I left the black top for the green lane it was approach midday, and I was feeling hungry. The green lane was shrouded by hedgerows that grew over the path creating a living tunnel to walk down. This didn’t provide much by way of places to stop for lunch, so when I came across a small patch of grass in front of a field gate, I took the opportunity to stop. It turns out had I gone another 50 yards I’d haven found a bench to sit on. Ah well.

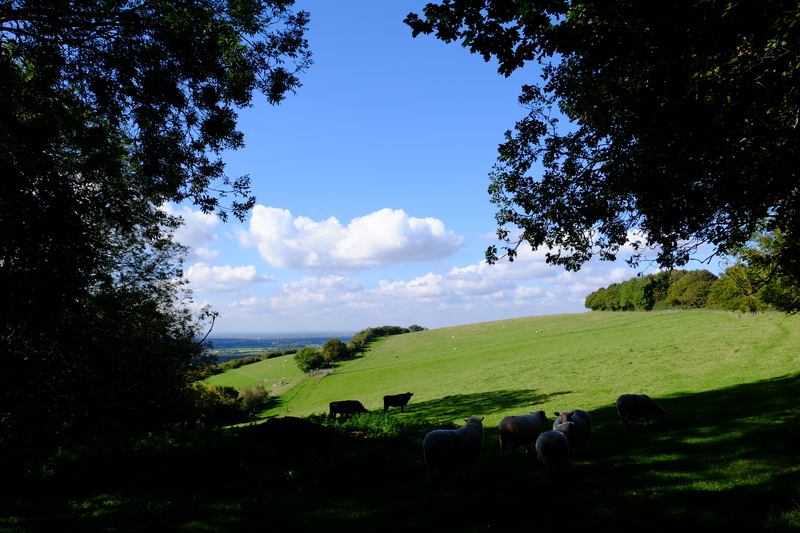
A field of sheep and cows.

The view from lunch.

Tree lined green lane.

Green tunnel of the NDW near Brabourne

Just as I was packing my bag from lunch a dog walker with a pair of cocker spanials appeared. I ended up walking and chatting with her for the new kilometre or so before our paths diverged and I continued along the NDW.

Leaving the green lane north of Brabourne Downs, my hitherto comfortable shoes started to play up. I stopped in another field gateway to fettle my shoes in the hope of making them more comfortable.

The insoles that the podiatrist had made for me are made of two materials, a relatively firm EVA foam, with a memory poreon coating. It was these two layers that had de-laminated, in so doing the upper poreon layer was bunching up under the heal and causing discomfort. I fettled with the insoles, donned my shoes and continued. From here on the walk turned from a pleasant hike in beautiful scenery, into a slog of ever growing discomfort. The distance I could cover between stops to fettle my insoles decreased as the journey continued.

Whilst stopping to fix my shoes, I also had the opportunity to admire the view of Kent in it’s autumnal splendour.

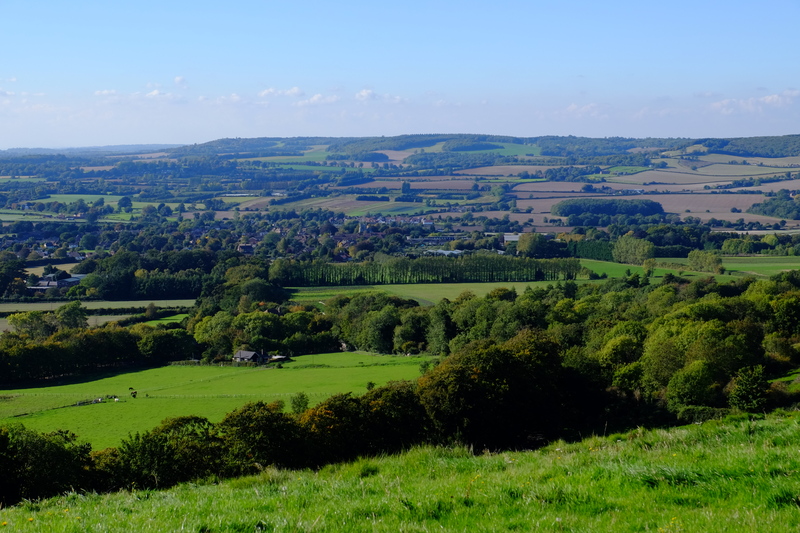
Wye from Wye Downs.

Wye from Wye Downs.

On top of Wye Downs I filled the pouch of my Sawyer water filter from a cattle trough. This was the first source of water on the walk I had come across, other than the Tiger Inn at Stowting.

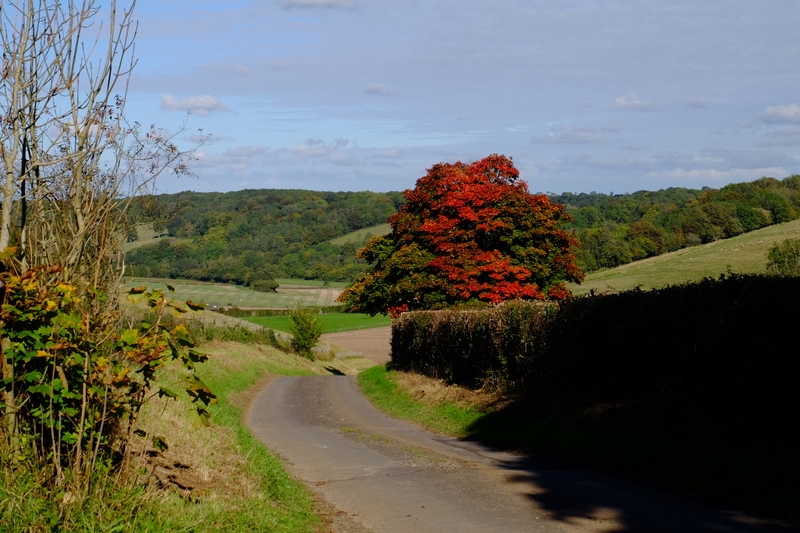
Autumn colours.

View from Wye downs, looking East.

As I started the descent from Wye Downs towards Wye, the walk become more of a hobble. Subconsciously in order to reduce the discomfort in my feet I adapted my gait, this compensation would later lead to sore muscles, as those not normally used in walking were called upon.

Once again the NDW changed, from the open land of the Downs it passed along the edge of fields freshly sewn with oil seed rape, past the old buildings of Wye college before passing alongside allotments to the back of Wye church.

The church yard of Wye church has a number of impressive yews. I hobbled on. The streets of Wye marked the final kilometer or so to the station, and the train back to Canterbury.

I’d missed the train I had aimed to get due to hobbling, which gave me a longer wait at Wye station. As I sat there awaiting my train, I checked over the route my GPS had logged. 17.9km. With the couple of kilometres to the bus stop in Canterbury it brought my total for the day to over 20km. In the previous 2 years since my foot injury, the furthest I’d walked in any one day had been just shy of 15km. I’d managed to go 33% further. It made me wonder, if I can get a more durable set of insoles, could this be the start of being able to walk properly again?

With this in mind, I boarded the train back to Canterbury and started to consider the possibilities for my next trip.

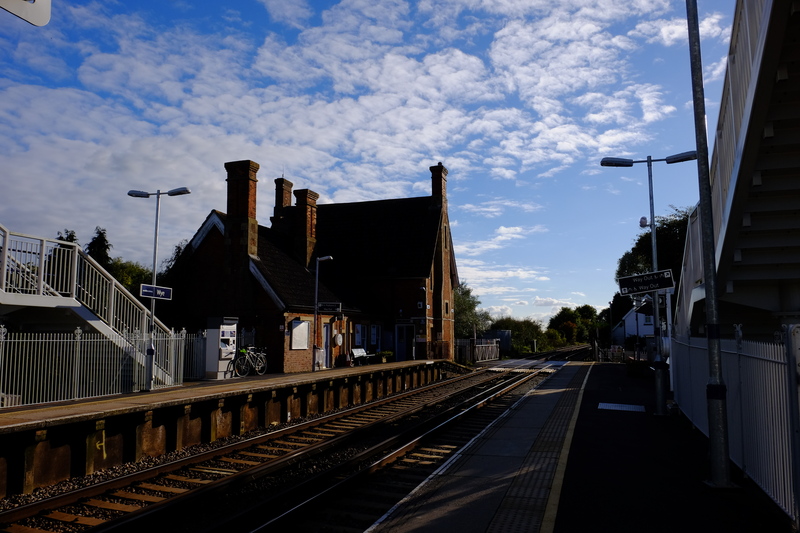
Wye Station in the Sunshine

Wye Station in the Sunshine

Postscript

Since doing this walk, the podiatrist has ordered me a new set of insoles which should be more durable, and to avoid the map issue, I’ve treated myself to the Harveys North Downs Way map.

I took a lot more photos on this walk that I could sensibly include in this post, the better shots I have put up on my photo website.

ADVENTURE: Going Dutch – A Dutch microadventure

August 2000

Through the gloom of the Sound of Mull looms a shape. As we descend, the shape takes on the form of a ships hull. The SS Breda lays with it’s stern at 22meters, 7m above the 29m Sea bed which slopes gently up towards the bow, with 19m of water above the front of the bow. My Dive buddy and I dropped onto the sea bed by the rudder, and after a few minutes playing with the squat lobsters, we rose up over the stern and entered the hull. Through cargo holds full of life we travelled slowly to the bow, before dropping over the bow to have a look at her from that angle. Alas our dive time was soon to end, and we slowly rose up to our safety stop at 3m. Hanging there in the gloom, I pondered my first wreck penetration. A beautiful vessel, teaming with life. I couldn’t help but wonder what the city the ship was named after is like, and decided that I should visit Breda at some point.

October 2015

I boarded the Half speed train service from Amsterdam bound for Breda. I had with me my trusty Brompton in a full touring config, loaded up with kit for a Microadventure in the woods. Watching the flat polder landscape pass by the window of the train, the first spots of rain started to appear on the window. That didn’t bode well, the forecast was for an overcast day, not rain.

Arriving into Breda Centraal station, I loaded the Brompton up with it’s baggage and alighted the train. This station has had extensive renovation work done to it producing a modern well thought out station.

Outside the station, I booted up the GPS, and hit the road. Or rather the Fietspad. Like every other Dutch city the streets of Breda are full of segregated cycle paths running parallel to the roads. I followed the GPS along these cycle paths past wide tree lined roads. The Netherlands has a reputation for being densely populated country, yet the roads are wide with green spaces between the buildings, avoiding the claustrophobic feeling you can get in other countries. As I progressed along my route, the buildings changed and things became increasingly rural. Medium rise buildings giving way to detached houses, giving way to fields.

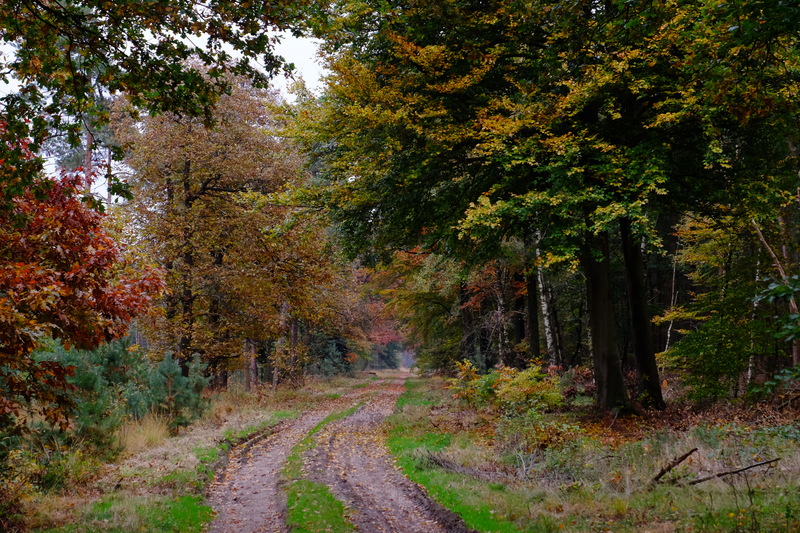
Eventually I crossed a motorway and decended into the woods. Being late October the trees displayed their autumnal clothes in a shades of gold, yellow and orange.

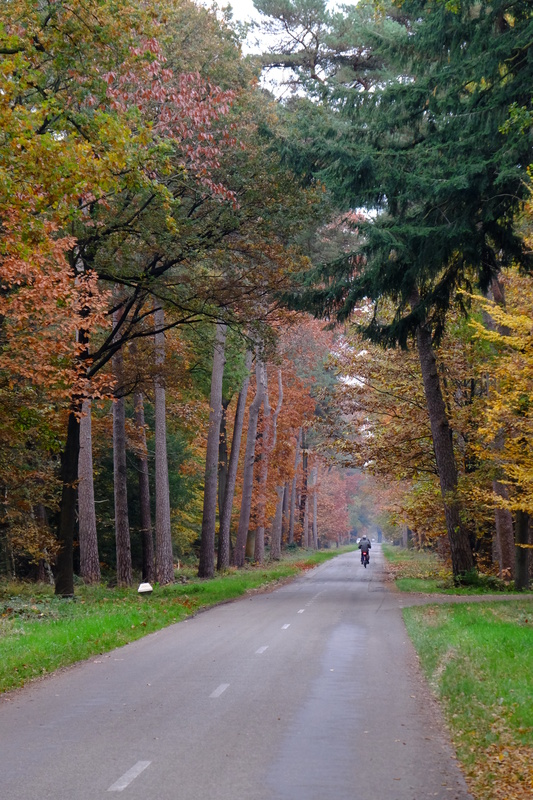
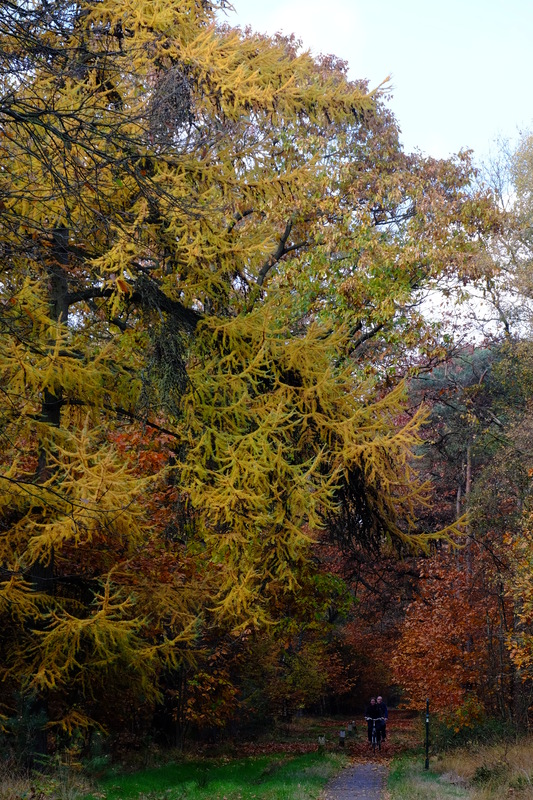
Cyclists in the woods.

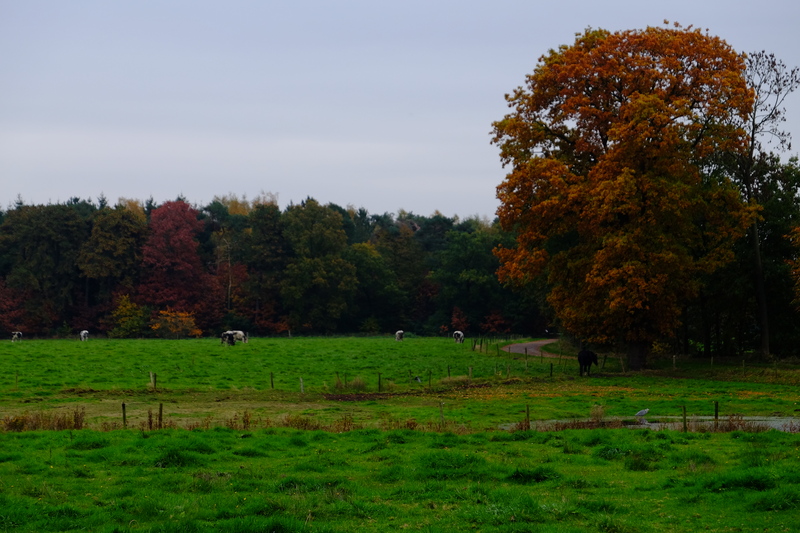
I progressed through woodland interspersed with pasture, stopping occasionally to take photos.

Pasture and Woodland.

As I progressed I rode into the Chaamse Bossen, the forest I was aiming for to bivvi for the night.

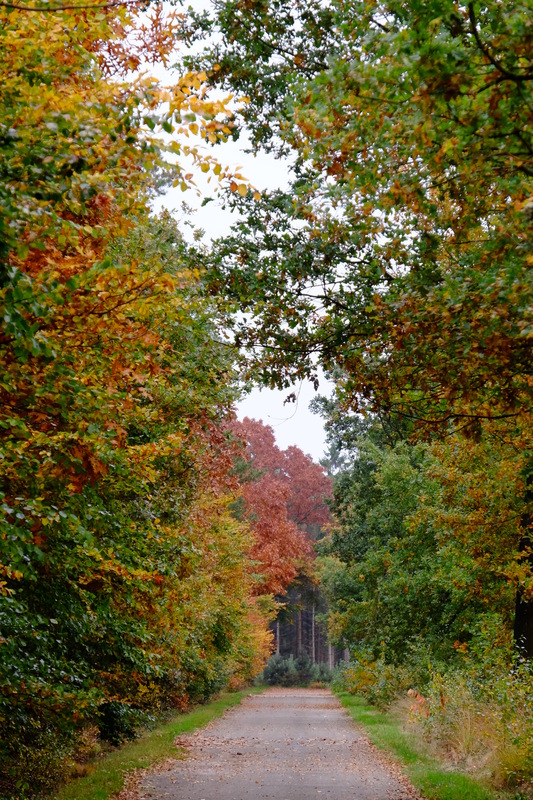
Autumn Colours

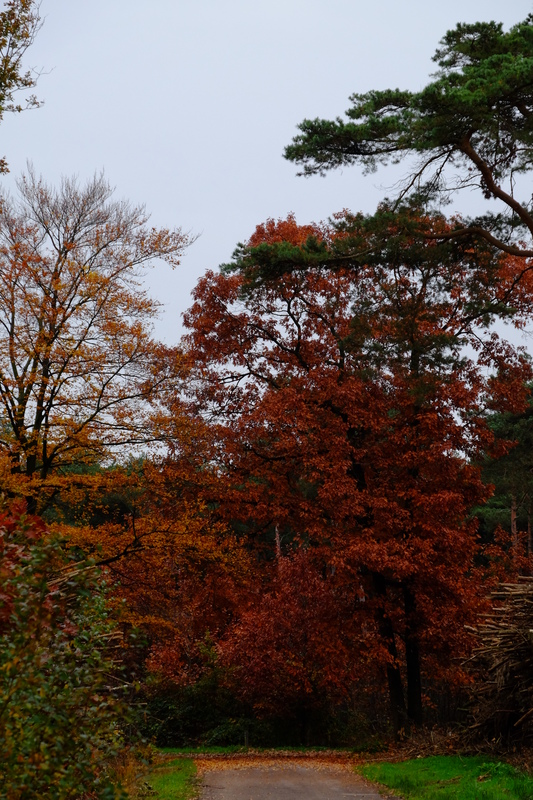
Everywhere I looked the colours shone from a pallet of golds, reds, oranges and yellows. The colours of autumn.

Autumn Woods.

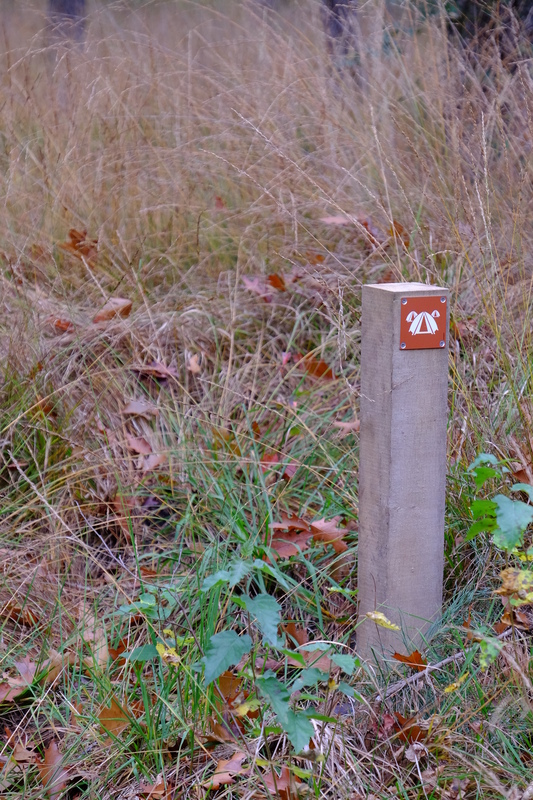
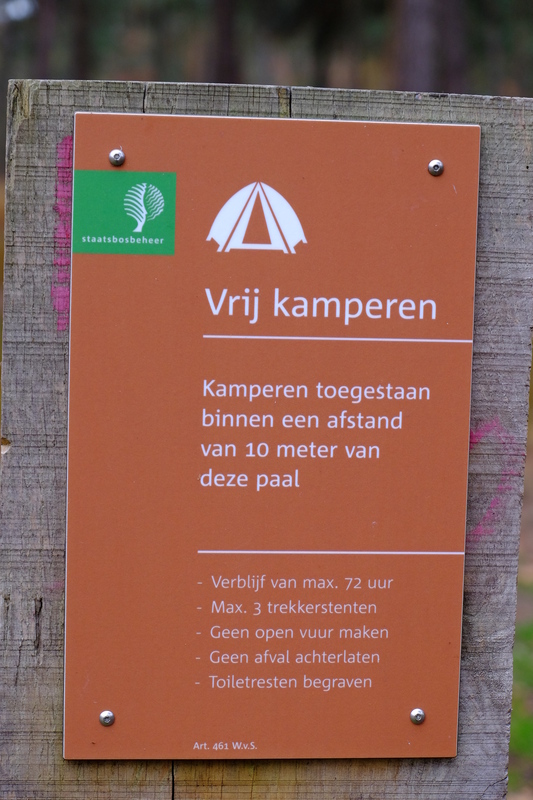
Across the Netherlands there is a network of authorised wild camping sites, each site comprises a wooden post in the ground with a sign on it, detailing that upto three tents can camp within 10 metres of the post. In the Chaamse Bossen three of these posts exist.

Pin oak in full autumn colour

A Pin Oak in full autumn colour

I followed the route I’d programmed into my GPS heading for the northern most of the camping posts. I had a loose idea of a plan to visit all three of the posts, and then decide which one to camp at.

Small camping post sign.

Sign on the path to the camping post

The first of the posts is located in a conifer plantation with an herb layer of golden grass. Intermixed with the conifers were the occasional hardwood.

Sign on the camping post.

The sign on the Posts. Loosely translated into English: “Camp within 10 meters of the post. Max stay 72 hours, max 3 tents, no open fires, take your litter home, bury your toilet waste.”

The website that lists all of the posts mentioned that fire wasn’t allowed, and I’d had a discussion with a Dutch friend who reckoned that this would include my little meths stove. I was rather surprised to find a fire pit next to the post. I was also slightly surprised to find two tents setup in the undergrowth, midweek in October I had expected noone else would be mad enough to be out here… I was wrong.

I looked at the map, the next post is 2.7km further south. Do I gamble on the next post being better, or do I go with this spot. I um’d and ah’d.

I decided to push on.

Given the impending sunset, I decided to put the camera away, and concentrate on getting to the next site fast. This meant that I arrived at the second site just over 10 minutes later, having pushed the bike along the last 50m or so to get to the post. Here I found the same fire ring, surrounded with a square of logs. Unlike the coniferous location of the first post, this one was a mixture of pines and hardwoods. The herb layer seemed to be mostly made up of mosses. There was noone else here. It would be perfect.

I chose a bivvi site between a small oak and a pine. It was only 1700, so rather than setup my bivvi bag, I decided to light a fire. Having travelled via eurostar, I was limited in what tools I could bring to the Netherlands with me. Just a Leatherman Juice CS4 and my Svord Peasant Mini had made the journey to the Netherlands with me, but I’d left the Leatherman in Amsterdam, not expecting to be able to have fire, I hadn’t expected to need it… Bah.

I’ll be limited to only burning what I could snap, or find already small enough to fit in the pit. Fortunately some previous users of the site had left quite a bit of material laying around, so along with the pile I collected I had a small number of chared logs. I started with some dead hanging wood I’d removed from an ash tree along with a pile of dried pine needles, arranging this on one side of the fire ring. I had in my bag a Spark-lite aviators fire kit, these are a small plastic box containing 8 tinder-quik fire tabs, and a single handed sparker. I fluffed up a tinder-quik, spun the wheel on the spark-lite. It caught first strike. I hadn’t quite been prepared for that. It also burned faster than I had expected because I’d fluffed it up too much. In my surprise I dropped the fire tab on the arranged kindling… missing. I tried to push it into the target kindling with a twig, but before I could, it burned out. On the second tinder-quik I didn’t fluff it up as much, so it took half a dozen strikes before it caught. I placed it into the kindling. The twigs caught. Success.

I spent the next 5 hours slowly feeding twigs into fire, cooked a simple meal, enjoyed the woods.

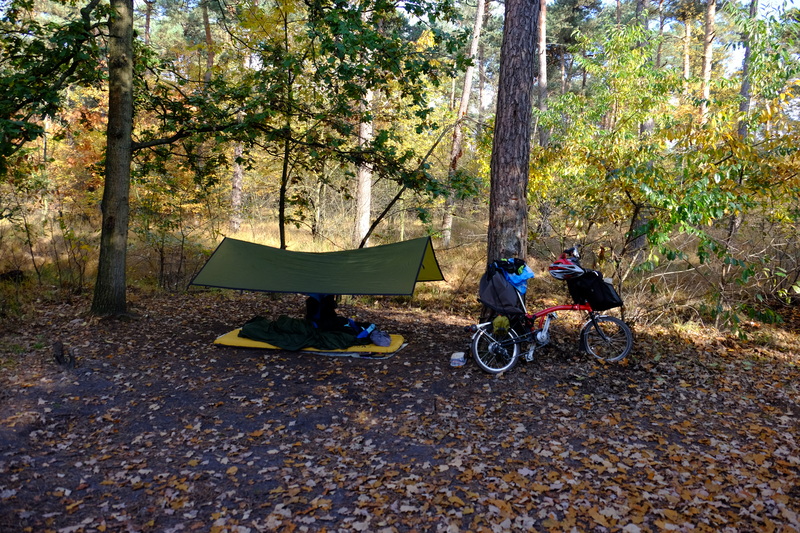
Starting to get sleepy at about 2200, I started to pitch my camp. Sleep mat inflated, bivvi bag rolled out with sleeping bag inside it. I started readying for bed when the first few spots of drizzel landed on my glasses. I had hoped to not need a tarp, but the weather wasn’t allowing that. I rolled out my small tarp in a basic A ridge config and crawled into my bivvi bag. I was glad of the tarp later in the night, listening to the acorns bouncing off it.

As I was arranging my self into my bivvi bag, something caught my attention in the direction of the path leading to the post, a light. Dimming my head torch I studied it. The light moved. Slowly the light approached the camp ground and I could make out it was attached to a bike. The light was shined at me. I turned my light on and flashed it back. A voice in the darkness said something in German. I replied in Dutch “Auf engels?”.
They repeated themselves. “Do you speak English?”
“Are you alone?”
“Yes”
He had a brief look around the area near the post before selecting a spot to pitch his tent, then spent the next 20 minutes noisily moving kit between his bike and the tent.

I woke up to my alarm at 0630. I’d chosen 0630 to be before dawn, so I could make an early start. I was slightly confused to find the woods lit up brightly. I poked my head out from under my tarp and looked up at a bright moon. That would explain it. I visited the shrubbery, and crawled back into my bivvi bag to watch the dawn.

I woke again at 1000 to find the woods filled with sunshine. Oops.

Woodland in the sunshine

A room with a view. The view I woke up to

I crawled out of my bivvi bag and sat by the fire pit. Coffee. I fired up the stove and tried to wake up a bit. I noticed that the guy who’d turned up late had already left, leaving behind a clear pitch. I sat drinking my coffee and soaking up the sunshine. Mug empty, time to pack up.

Tarp and Brompton.

My camp. The dip in the ridgeline is my jacket hanging up to dry.

It took about 10 minutes to get everything loaded back on the Brompton, and I set off into the woods for the 18km ride back to Breda and the train to Amsterdam.

On the way here the day before the trees had looked amazing even in the grey overcast. This morning in the sunshine they looked even better.

Cyclists in the forest.

I wasn’t the only one who had ventured out on the bike to enjoy the warm autumn weather, as I cycled back to Breda I passed a number of cyclists, ranging from lycra clad road cyclists zooming past, to old couples slowly plodding along. The ride back was faster than the ride to the woods, and it wasn’t long before I reached the edge of Breda. I was struck by the juxtaposition of a medium rise block sat on one side of the road, while on the other side grass fields and farmland. A meeting of city and countryside, and everywhere there were trees in stunning display of Autumn colours.

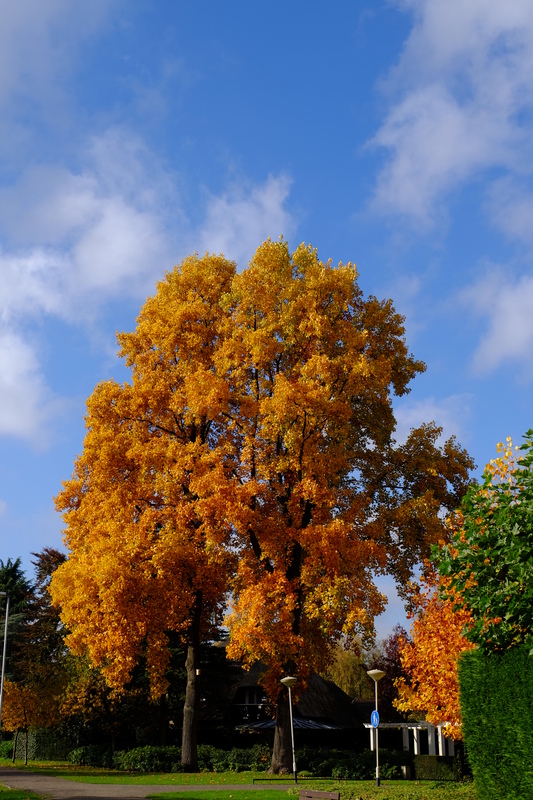
Orange coloured tree.

This tree was less than 1km from the railway station, next to a main road.

I stocked up on food and drink in the AH togo at the station, before boarding the half speed service back to Amsterdam, recharged and invigorated after a fantastic night out in the woods. Breda and the Chaamse Bossen was fantastic, I might have to come back.

REVIEW: Páramo Bentu update

Just days after I posted the review of the Páramo Bentu windproof and fleece, I noticed that the zip on the windproof had become separated from the body of the jacket about ⅓rd of the way up. I phoned the Wadhurst store at 0900 on Saturday morning, and explained the situation. As the Jacket was so new they agreed to replace it rather than repair. I posted the jacket by Royal Mail secure delivery first thing Monday morning, they received it just after 1000 on Tuesday morning. The brand new replacement arrived by Royal Mail 48 hour delivery this morning (Thursday). I’m guessing Páramo will repair the jacket and it’ll appear in the Páramo seconds shop on ebay in due course

Páramo didn’t quibble, and did a really fast turn around. Great customer service.

REVIEW: Páramo Zonda and Bentu Jackets.

I’ve used my Páramo Quito jacket for all of last autumn, winter and spring as my main jacket, be it cycling to college, hiking the Downs, or just wandering to the shops. It has worked pretty well, breathing better than any membrane based jacket I’ve owned, but like much of the Páramo range, it has one major draw back. It’s warm.

In the middle of winter the fact I can hike in just a jacket and base layer has been useful, I can leave the fleece at home. If I was warm, I could use the pit zips to vent. But as summer approached, no amount of ventilation was able to counter the laws of physics. Páramo is warm.

With this in mind I did some research into alternatives that might be more suitable to summer use, particularly when a cool breeze takes otherwise T-shirt weather, and makes it chilly. My research led me to the Páramo Zonda windproof and fleece combo.

For those not familiar with the way Páramo works, rather than having a moisture permeable membrane (like goretex), they use multiple layers of polyester fabric, treated with wash-in black magic from Nikwax to create a waterproof garment with what Páramo call “directionality”, and what users call “great moisture management”.

This multi layer fabric combo is comprised of a inner most “pump liner” which is a very fine micro fleece, and a water resistant outer which is a tightly woven polyester fabric. With this combination of micro fleece and tightly woven polyester, you can see why Páramo garments are well known for being too warm for summer use. Especially if you’re only after the wind proof feature.

What the Zonda windproof and fleece does, is take these two layers and split them into two garments. A thin lightweight wind proof, and a thin light weight windproof fleece. Wear them together and they perform the same as any other waterproof made from Páramo’s “Analogy Light” fabric. Great, sounds perfect.

I wandered along to the Páramo store in Covent garden with cash in my pocket ready to buy a Zonda windproof and fleece combo.

Which is when things kinda didn’t goto plan…

First thing that struck me was the colour choice, neither the neon blue or the pink clover are particularly muted, they both screamed “GIRLIE!” In a loud way. Maybe the I could live with the blue… it’ll mostly be under a backpack anyway. Let’s try it on…

I picked the largest size off the rack put it on, went to do the zip up, and failed. I could do the first inch or so over my stomach, but as it approached my upper chest there was no chance of being able to zip it closed over my breasts… ladies fit… made for women… women have boobs… well not those Páramo is targeting their women’s range at obviously. I had a lengthy discussion with the very helpful staff and tried on various items from the women’s range. Nothing fitted. I’m not exactly massive, most of my clothes are 16-18 depending on where I buy things1.

There is a men’s version of the Zonda combo, called the Bora, but this is a smock format, not a jacket format, so while I could find something to fit, I really wanted a jacket rather than a smock.

Having been shut out of any of the women’s range due to having breasts, I turned my eye too the men’s range.

Where the ladies range covers various sizes of pixie, the men’s range is much wider, covering sizes large enough I could fit my back pack inside the jacket2. Maybe something here will fit…

Following the same principal of splitting the classic Páramo layers into two garments, there are a few options in the men’s range. As well as the previously mentioned Bora smock, there is the Enduro jacket (ladies version: Ventura) and the Bentu jacket (ladies version: Zefira).  There is also the Fuera ascent jacket, and Fuera smock, tho there two don’t have matching fleeces3 to go with them unlike the Bora, Enduro and Bentu. The fleece that pairs with the Enduro is a smock, not a jacket, so I discounted that. This just left the Bentu windproof jacket and fleece.

The Bentu is available in two colours, a blue, and a green. Tempted tho I was by the green for not standing out when on the hill, the shade of blue used is sufficiently dark as to be acceptable.

The Bentu has two chest pockets, both big enough to take an ordnance survey active map, and two hand warmer pockets. The fleece has two hand warmer pockets and a Napoleon pocket, just the right size for a compass or small wallet. The main zip is two way to aid in ventilation. But unlike the Quito, Enduro or Fuera ascent, it doesn’t have pit zips4.

The windproof has a pump liner layer on the shoulders and hood, which makes it more rain resistant than it would otherwise be. The sleeves are a loose cut with a Velcro adjuster on the cuff, this allows you to roll your sleeves up for venting.

The cut of fleece is quite loose, and it reminds me of a cardigan in it’s fit. There is no hood, and no adjustment on the loose fitting sleeves. Again you can push them up for ventilation, but without the Velcro, there’s nothing to stop them falling down.

But what about the important part, how well does it perform?

Both the windproof and the fleece have proved to be windproof, if it’s not raining, which of the two layers you wear for wind protection comes down to temperature. Warmer, wear the windproof. Cooler, wear the fleece. In a light shower both keep most of the wet out, tho the fleece seems slightly better in drizzle or a short light shower. I had wet forearms wearing just the windproof in the rain, but the rest of me was dry.

The cycle ride to college today was your typical early autumn rain, not hard enough to make you think you need a jacket, but enough to soak you if you didn’t wear one. I wore the Bentu fleece for the ride and arrived at class nice and dry, with lots of droplets of water beading on the outside. A success.

By the time I left college for the ride back to the station, the rain had picked up, so I chose to wear both layers. Alas the fleece hadn’t completely dried during class and the forearms were still a little damp. A good chance to test the moisture management me thinks…

I set off into the Kentish night, hood up against the rain, and peddled my way the half hour to the station. As I rode the warmth of my body drove moisture from the fleece. Even with the additional liquid water falling out the sky. By the time I had spent 20 minutes on the platform waiting for my train, the inside of the sleeves of the fleece were no longer wet, but somewhere between damp and moist. By the time I got home, they were almost dry. The rest of me stayed dry throughout.

I can’t fault the performance, together the fleece and the windproof work just as well as my Quito, yet at the same time providing me greater flexibility for when it’s dry, warm, yet windy. So what are the downsides of this performance? The main down side is the weight. Neither item is particularly light. My size large fleece measures 420g, and the Windproof 458g. By contrast my size Large Quito is 545g, a weight similar to what I would expect a Zonda combo to weigh, if it had fitted me. Other than that the only other niggle is the absence of a hanging loop on the fleece, making it so I can’t hang it up on the hook as easily.

In summary:

Páramo Zonda Windproof and Fleece combo:

  • Pros: Unknown
  • Cons: Women’s XL is too small for me.

Páramo Bentu Windproof and Fleece combo:

  • Pros: Great performance, great breathability
  • Cons: Weight.
  1. I wear a size 16 RAB MeCo Baselayer
  2. S, M, L, XL, XXL in mens, vs XS, S, M, L, XL, in womens. Mens L is larger than Womens’s XL…
  3. The Fuera ascent was designed to go with the Summit hoodie, but this is no longer listed on the Páramo website
  4. Interestingly while the men’s Enduro has pit zips for venting, the ladies Ventura doesn’t… do women not get warm?