“I’m off for a hike, back at 5”
It’s a phrase I’ve uttered a variant of many times, be it to my house mate, or via text to another friend. Each time it’s a clear message. If you haven’t heard from me by 6, call 999 and ask for search and rescue. I usually accompany it with a brief explanation of my plan “I’m going to walk in the Kings wood” or on bigger walks I may leave a GPX of the route with them.
The reason for this procedure is that often in the areas I hike in, there is no phone signal. Even in somewhere as densely populated as Kent phone signal is not a given. Alas as a procedure, it’s not perfect. If my walk started at noon, and I fell over and broke my leg at 1, it’s going to be 5 hours before the call is made, and another hour or 2 before rescue will get to me. That’s a long time to lay in pain on a hill side. In such situations a broken leg can easily become complicated by things like hypothermia.
I experimented with the Buddy beacon on the Viewranger app, which provided some tracking of my position while hiking, but it was always let down by a poor mobile phone coverage and even poorer battery life. There had to be a better way.
Enter the DeLorme inReach range of devices. These devices work not off the mobile phone network, but off the Iridium satellite network. Iridium was launched in the closing years of the 20th century as a satellite mobile network for global use. The history of the bust and bailout of Iridium could fill an article in it’s own right, so I won’t go into that, you can have a look on wikipedia, it’s an interesting story that’s worth a read.
The original inReach provided SOS and 2-way messaging functions, but relied on pairing with a mobile phone to provide full messaging functionality. But the leap forward comes with the Explorer and the SE devices.
The inReach SE and the inReach Explorer have the same basic form factor, a bit like a ruggedised older style mobile phone, with the antenna sticking up on it. Both devices share the SOS, two way messaging, social media messaging (send only) and position tracking. To this the explorer adds traditional GPSr functionality, with way points, positioning, Barometric altimeter, electronic compass, route management etc… The price difference between the two units is about £50. Or the same as a very low end GPS like the Garmin eTrex 10.
I’ve wanted a device like this since I first followed the launch of Iridium back in the last century, but when I saw the price of both the devices and the connectivity contracts I concluded that it would be forever beyond my reach. Fast forward by 17 years, and things have changed a bit. Iridium devices are still much the same price, and usage is much the same cost. Only inflation means that relatively speaking the price has come down a lot. But along with the improvements in cost effectiveness, so have come improvements in devices that can use the network. I was amazed to discover that you can buy a device like the inReach Explorer for less than the price of a middle of the range smart phone. But more importantly the usage prices have come down dramatically. I’ll go into this in more detail shortly.
In July I treated myself to an inReach Explorer, and signed up to the Recreation plan on a 1 year contract. The device arrived by FEDEX less than 24 hours after I placed the order. It comes in a box with a charger (US socket), USB cable, lanyard, and manual. I also bought the case to go with it. The device itself is waterproof to 1M, but does not float. I want to be able to use it while Kayaking/Canoing and so bought the extra case. In High Visibility Orange, it both floats, and should be pretty obvious if I do drop it in the drink.
When you get the device you first have to charge it up, then activate it. In order to activate it you need to decide what usage plan you want to use. DeLorme offer 4 levels of usage plan for individuals, and you can choose an annual or monthly contract. If you opt for a monthly contract, you can choose to not pay anything for the months of the year you don’t need it. So if you only tend to hike in the summer months, or only want to use the device on certain trips, you only pay for the months you need. Conversely, if you expect to use the device regularly, then the annual contract works out cheaper per month. The four plans range from the “Safety Plan” at $14.95 per month ($11.95 per month if you have an annual contract) to the “Extreme Plan” at $99.95 ($79.95 per month with an annual contract). At $11.95, you get unlimited SOS, 10 text messages, unlimited preset messages, and a minimum tracking interval of 10 minutes. Tracking points and location pings are $0.10 each, and if you go over your 10 messages they are $0.50 each. The next plan up, the “Recreation Plan” is $24.95/$34.95 per month, and perhaps the most useful of the plans. Here you get 40 text messages, unlimited tracking and location pings. Above this plan the price jumps significantly and gives you unlimited messaging. Then for the top level plan, it increase the tracking frequency to 2 minutes.
What are preset messages? These are upto 3 messages you pre-program into the device. You have to decide both the recipient and the message content. I’ve got these programmed to “I’m OK” “Made camp” “Breaking Camp”, and they go to a couple of friends. You can send preset messages either from the preset menu in the device, or by holding down X button until it gives you the menu. Each preset message when it is delivered to the recipient includes your position as both a link to a map with a “they are here” indicator, and as a lat/long position. Being included with all plans these are a really useful way of keeping friends and family up to date with your status.
What are tracking points and location pings? If you go into the tracking menu you can activate the inReach device to relay your position via satellite every x minutes, where x is the interval you choose. This is limited to a max frequency of 10 minutes or 2 minutes depending on plan, but you can also set it to be less frequent, once an hour say. These tracking points are sent to DeLorme and can be shown on the mapshare system. Mapshare is DeLormes platform for sharing your position. You can share this with friends/family so they can track your progress, they can also use this to message/ping you. This is where location pings come in. Someone with access to your Mapshare page can ping your device to see where you are. It’s like a tracking point, but pulled, rather than pushed…
When a message arrives via text, it looks something like this (Note link doesn’t work, and position is made up, just here for example purposes)
“I’m OK. http://dlor.me/ABCDEFGH 51.12345 0.9876”
This allows the recipient to look on the website and see where you are. Those you give Mapshare access to can also send you text messages. The receiving of these messages come out of your allowance, or cost you $0.50 if you have used all your included messages.
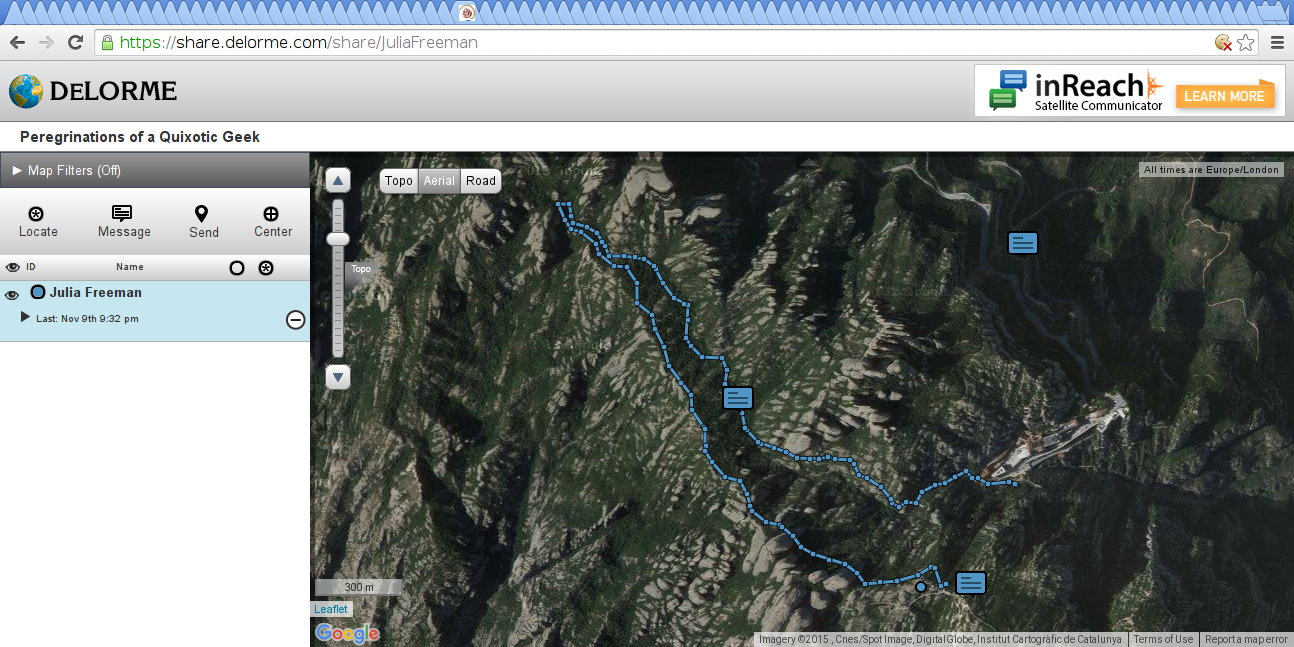
The Mapshare interface – Locate (ping the device), Message (send a message to the device), Send (send a position to the device), Centre (centre the map view on the device’s position)
You’ve charged the device, you’ve entered your card details and started the activation process. At some point you’ll be told to go outside and give the inReach a clear view of the sky so that activation messages can be sent. This also gives you an early indication of the limitations of the device. You need a clear view of the sky. You can’t send messages from indoors, and even a thick tree cover can stump it. Vehicle use seems to be variable. In a car I’ve not had issue, but when I’ve tried on a train, it’s been temperamental, that said the message was sent eventually…
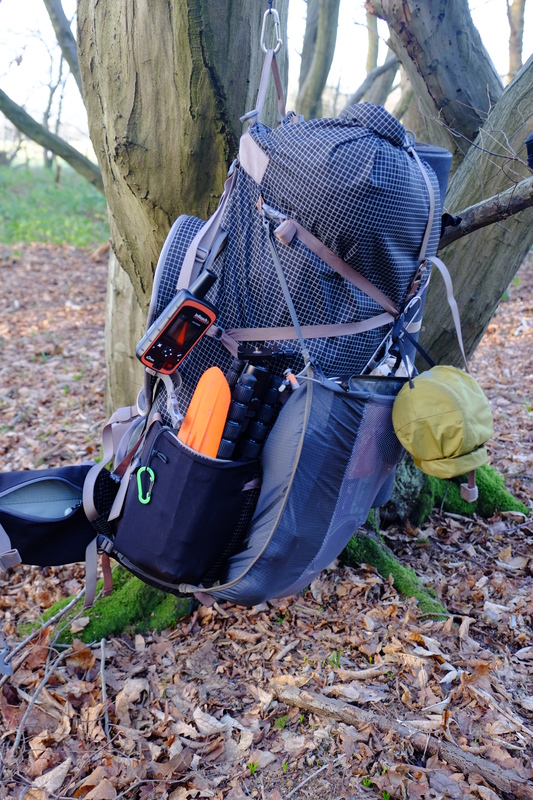
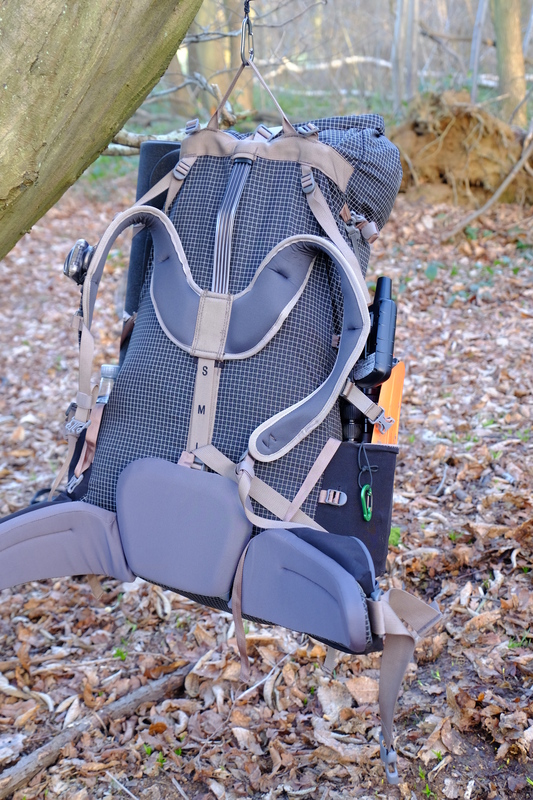
Device activated it’s time to use it. If you’re using the tracking functionality or want to be able to receive messages, you need to make sure the device is somewhere it can “see” the satellites. This means not in a trouser pocket… I carry the device on the left shoulder strap of my pack. It comes with a belt clip that allows attachment of the device. This clip has a rather aggressive barb on the end which makes it a pain to get on and off, but at the same time does reassure you that it’s going nowhere. I back up the clip with the lanyard, which I have carabinered to my pack strap as well.
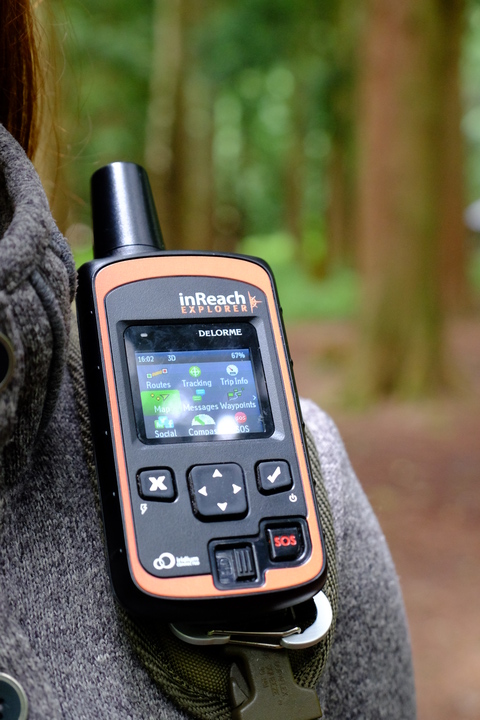
The DeLorme inReach Explorer mounted on the shoulder strap of my backpack.
The difference between the inReach Explorer and the inReach SE, is that with the explorer you get normal GPSr functionality included. This means that when tracking, as well as just sending your position, it also allows you to log the position locally. This local logging has the advantage that it doesn’t use tracking points (if your plan doesn’t have these for included), and can be done at a higher frequency than you can transmit. If you opt for a logging frequency of higher than once per minute you will get a message telling you that this will result in the GPS receiver being always on and will increase battery usage. For this reason I have my logging interval set to 1 minute, and my tracking interval set to 10 minutes. You can download the GPX trace to your computer when you sync the device (more on that shortly).
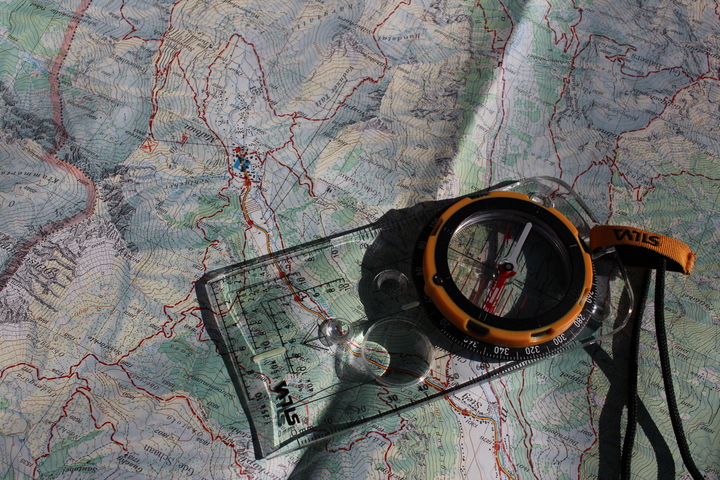
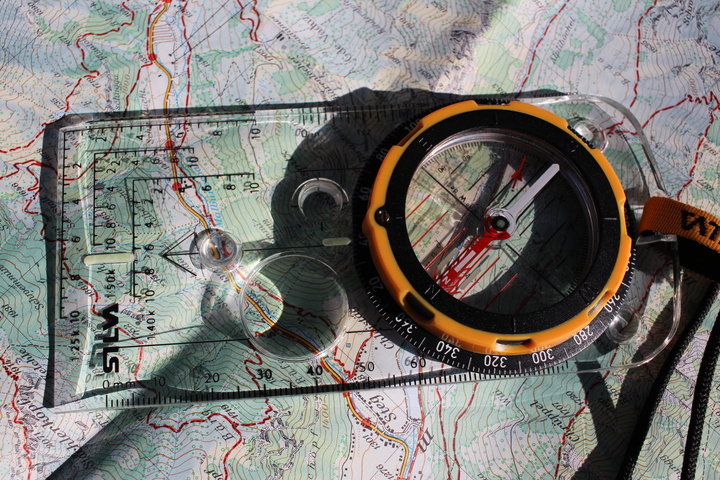
This GPSr functionality includes a Barometric altimeter and an electronic compass. Due to the peculiarities of how the GPS system is designed, accuracy of altitude position (z axis) is lower than your position on the x and y axis. This means that you can’t normally rely on having a GPS for altitude positioning. Having an altimeter is a really nice touch to the Explorer, it’s useful when you want to follow a set contour round a hill for example. The electronic compass is not a replacement for a normal compass when used with a map, the shape of the device means you can’t easily use it as a baseplate compass to get a bearing from a map, where it does come in useful is when you know that the next way point is on a bearing of 097°, you can hold the device in front of you and rotate until you are pointing the right way.
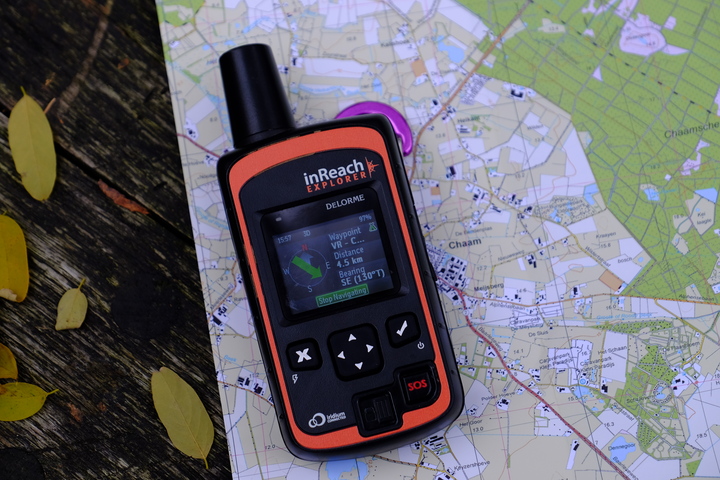
Device in compass mode to align the map.
Messaging on the inReach is it’s key feature, and one it does well. Typing messages is not the easiest interface ever used. Text entry when you don’t have a full keyboard is never going to be great. If you’ve used a normal GPS before you’ll be familiar with the cludgyness of their text input. DeLorme try to simplify this via a predictive text mechanism. This isn’t perfect, but it’s better than nothing, the main limitation is that the dictionary is American English and perhaps favours words more suited to an American hunter than a British hiker, I’ve also not worked out how to add words to it’s dictionary. There are mechanisms within the device to make things a bit simpler. You can pre program some messages that are common ones to type. “Yes” “No” “I’m running late” “It’s all uphill” “Weathers here, wish you were nice” etc… These don’t count as preset messages so they are charged either out of out allowance or at $0.50, but it does make it a bit easier to type. The other option you have is to pair the device with your phone and use the keyboard functionality that provides to type the messages.
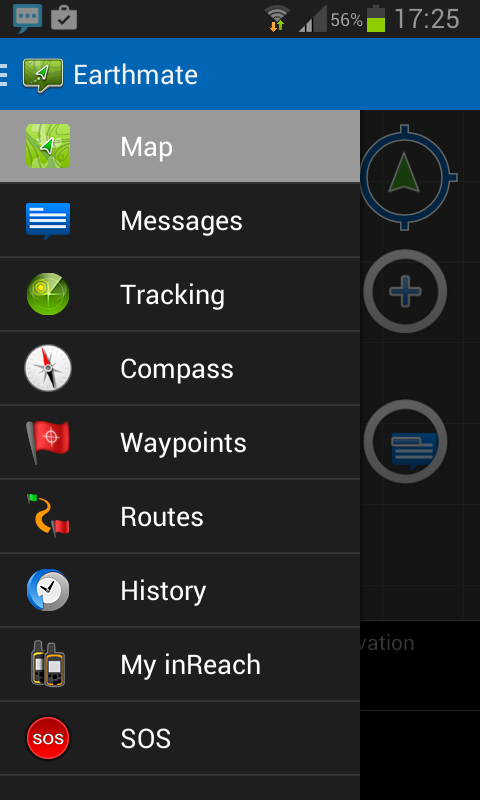
Functions available via the Earthmate app
Pairing the inReach with the Earthmate app on your phone gives you the ability to use all the inReach’s functions with the additional ability to download maps to your phone and use those with device’s GPSr functionality. I’ve not really used the app much, I tried it on a trip to Monserrat, and upon closing the app, it kept my phone from sleeping, and drained the battery. With the latest version of the firmware for the inReach explorer DeLorme introduced what they call “wireless sync”. This upgrade is advertised as allowing you to use your phone to sync your inReach’s messages and contacts. In the process of writing this review, I synced my inReach via the Earthmate app, and was surprised to find that it had also uploaded the logged track info to the website, meaning I could log in to the DeLorme website, view the detailed trace, and download it. This was a surprise to me, and the first draft of this review had a rant about how you can’t get a GPX out of the device without using the Windows or Mac based sync. Perhaps it would be better instead to grumble about poor communication of the additional features in the upgrade by DeLorme… You still can’t sync the firmware via the Earthmate app, for that you do still need either a Windows PC or a Mac, but seeing as firmware upgrades are something you only have to do rarely, it’s not a show stopper. I have enough friends that do have Windows or Mac laptops that will let me borrow them to update the firmware, that I can manage.
When I read the email announcing that wireless sync was now supported in the Earthmate app, I got my hopes up that perhaps I could download the GPX from the inReach to my phone. Alas, no such luck. It would be nice to be able to download the logged track info out of the device without relying on Internet connectivity to do so. Earthmate might be able to upload the track to DeLorme for you to view via the website, but you can’t just download it to your phone, to back it up. This is a major failing of the app. Given the limited space in the device for logging your track, the ability to download it to your phone periodically would be great a really useful feature.
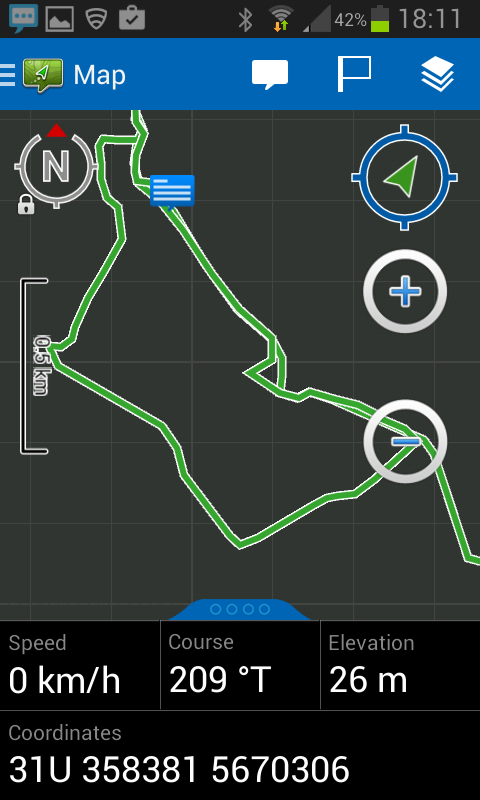
Earthmate app showing the route trace.
The other significant messaging feature of the inReach is under the menu item “Social”. This allows you to post messages via satellite to Facebook, Twitter, and Mapshare. You have to configure access for DeLorme to do this via the same website you configure the rest of the inReach’s functionality and payment info, but once setup, you can use the social menu to post to these Social networks. I don’t have a Facebook account so haven’t tested that, but I’ve used it to tweet frequently. There is something rather amusing about laying in a bivvi bag on a mountain side in Spain and using a multi billion dollar satellite network to tweet about what it is I had for breakfast… One of the settings when you configure social media connectivity is position info. You can set it to include your position info, or a link to your mapshare page in your tweets or facebook posts, the same as it does in your texts. I have this disabled, I don’t want twitter knowing where exactly I am laying in a bivvi bag in the woods.
The final major feature of the inReach Explorer, and perhaps for many the main reason you buy the device, is the SOS functionality. You can activate this three ways, via the Eearthmate app, the SOS menu option, or by sliding the switch on the face of the device then holding the SOS button for 5 seconds. For obvious reasons, I’ve not actually tested this feature, and I hope I never have to. I’m assured by DeLorme, that as long as I slide the switch and press the SOS button for 5 seconds someone will come to help me. Even if I then lose consciousness. I have to go on trust that this will happen. It’s a leap of faith. Press button receive-helicopter. In theory if you are still conscious, having activated the SOS call, you can then communicate with the rescuers with info such as what injuries you have, number of casualties etc… I’ve not tested this… Tho I wouldn’t like to have to type out details of a thoracic spinal injury under stressful conditions using the standard text input mechanism.
One of the questions that I have been asked by a lot of people who have first asked “What’s that device on your shoulder?” is “Who pays for that?”. Again it’s not something I’ve managed to get a clear answer to. In the UK, last I checked a Mountain Rescue callout isn’t followed up by an invoice. Nor do the local HART team request your card before evacuating you to hospital. But this isn’t the case everywhere. For many activities travel insurance covers some of these costs. But if you are at all worried, DeLorme offer a $17.95 a year policy covering you for upto $100000 of SAR costs. I’ve not opted for this while I’m wandering around in western Europe, but if I venture further afield I will seriously consider it.
So far I’ve used the DeLorme inReach Explorer in Britain, Spain, France, Germany, Luxembourg, Belgium and The Netherlands. It’s worked great for messaging friends, tracking my position, posting to twitter, and GPSr functionality. The $24.95 a month comes out at about £16 with the exchange rate, which is less than many pay on mobile phone coverage. I’ve yet to exceed the 40 messages per month, and have transmitted over 260 tracking points. I love the inReach Explorer and it’s become a permanent fixture to the left shoulder strap of my pack.
Postscript.
If you have found this article of use and are considering buying a DeLorme inReach, be it the Explorer or the SE, please do so by clicking on these links – DeLorme inReach Explorer, DeLorme inReach SE. It helps pay for the running of this site and the adventures that it is based upon.