For a while now I’ve been wanting a new pack for winter use as well as for longer multi day trips where I need to carry more than 2-3 days food. My Osprey Tempest 30 is a great pack, but it’s 30L capacity becomes a limit when I want to use my big bulky synthetic winter sleeping bag.
After much deliberation I narrowed my Choices down to 4 packs. Osprey Exos 58(1.37kg), Z-Packs Arc Blast 60(601g), Gossamer gear Mariposa(825g (medium)), and the Exped Lightning 60(1120g). Despite being heavier than both the Arc Blast and the Mariposa, I decided on the Exped. Whilst my kit is lightweight, and getting lighter, I still have heavy synthetic sleeping bags, as well as wanting a pack for use when I need to carry several days worth of food. Working on an assumption of 800-1000g per day for food, a weeks food is 7kg. Given the Arc Blast and the Mariposa seem to top out capacity wise at around 35lb, the 24kg (note unit change) capacity of the Exped leaves me with plenty of comfortable range. Sure I don’t want to carry a 20kg pack any great distance, but knowing that my pack isn’t going to be massively uncomfortable after resupply is nice.
Main Pack
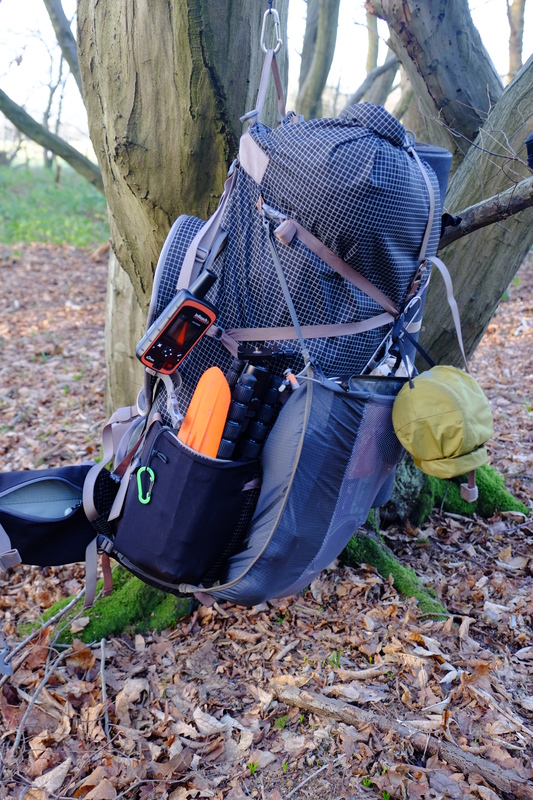
The pack in use with Flash pocket on the outside.
Enough of why I bought it, onto what I bought. The pack is pretty much as basic a pack as you could want. In terms of construction it’s effectively a dry bag style main compartment, with a couple of stretch side pockets, a compression system, all attached to a back system. Exped list the weight as 1120g, my pack comes in at 1070g on my scales.
The bag has a closure system similar to a dry bag, but the seams are not sealed so it shouldn’t be submersed or treated like a dry bag. It’s made from a Dyneema grid stop fabric which doesn’t seem to be that crisp packetty like Cuban fibre and Sil Nylon can be, but not quite as quiet as canvas. The fabric is 210 denier thick, 160gsm nylon with Dyneema reinforcing, all with a waterproof PU coating with a 15000mm hydrostatic head. Or put simply: a durable ripstop fabric. I went for the black pack as it was the colour least likely to stick out when walking in the wilderness. I don’t like bright colours in the outdoors and prefer if I can blend in with my surroundings, rather than being visual pollution.
Next to where the T bar of the back system attaches to the pack there is a waterproof zip that gives access to a pocket. On my first trip out I accidentally left this zip open by a couple of millimetres and it made the contents rather damp. This pocket is effectively a free floating flap inside the pack, I find it helps when closing the pack to lay it across the top of the contents so you can access it easier from outside. On the inside of the pack the pocket has a separate zipped mesh compartment. Other than that the inside of the pack is just one big compartment, no dividers, no zips, just a simple bag of holding.
On the each side of the pack there is a stretch pocket, these are plenty big enough for a 1L Nalgene bottle, I tend to carry a 1.5L Evernew water pouch in the right hand pocket which fits nicely. When this pack was first released, the side compression strap went over the top of the side pockets greatly reducing their utility. Exped have since released a new version (the 2014 version I have), which routes the strap through the pocket, so that it doesn’t interrupt it’s use. If you want you can still rethread the compression strap over the top of the pocket.
The rest of the pack is criss crossed with a selection of compression straps. These are made of a lightweight webbing tape which isn’t the most stable of straps. If you pull it too tight it tends to curl into a cylinder rather than remaining flat. In practice this hasn’t been an issue to me. The straps are long enough that I can fit a CCF roll mat on the side of the pack. To avoid having excess flapping about in the wind each strap has a velcro wrapping so you can roll up the excess, it’s a nice touch.
Along with the compression straps there is space for a couple of ice axes or similar, plus a few extra loops you could thread with bungee cord if you wanted to add a roll mat to the bottom, or carry something else on the outside.
All in all the storage section of the pack is basic and to the point. In the trips I’ve used it I’ve not found any real issues with the compression straps, or lack of compartments. Exped seem to have got a really good balance of features vs simplicity.
Back System
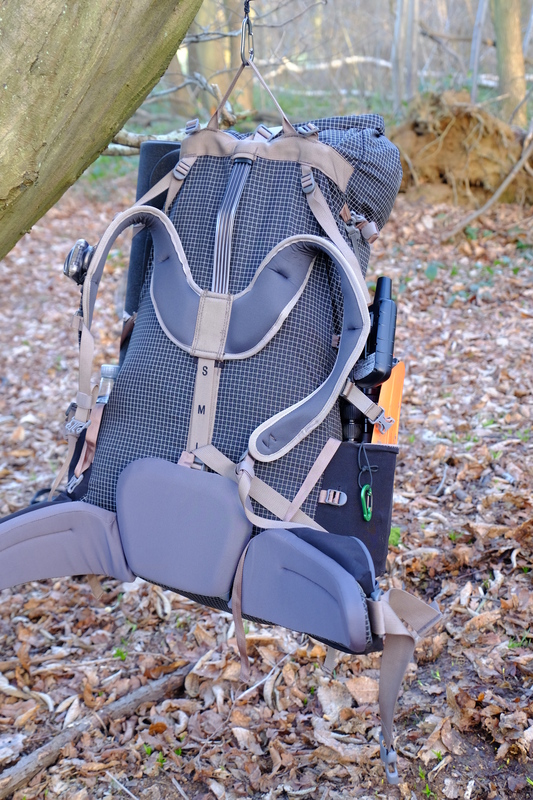
The back system of the pack.
If you judged this pack my it’s storage compartment alone then it would be nothing special, just a simple back pack. Where Exped’s ingenuity has shone through however is in the back system.
The core of the back system is a central corrugated aluminium stay. This slots into a slot at the top of the pack where it interacts with a cross piece and into a slot in the hip belt at the bottom. The hip belt is made up of 3 large foam sections, one fits into the lumber part of your back, and then the two sides wrap round your waist (this is clearer if you look at the photo above). The shoulder harness has a yoke shape which is free to slide up and down on the aluminium stay, but held at their upper reach by a webbing strap marked with S M L (small medium Large), that fits to a tri-glide attached to the hip belt. There are a pair of load lifters that come from the T bar and attach to the shoulder yoke. A grab handle also connects to the T bar.
This arrangement of straps, metal and foam allows for a back system that transfers the load onto the hips like no other pack I’ve tried (I’ve tried too many…). Fully loaded with 10kg of kit, with the waist belt cinched into place, the load is transferred onto the hip belt so effectively that I can loosen off the shoulder straps, and the pack just stays in place. You only really need the shoulder straps to stop the pack from tilting backwards.
Dialling in the back system is not the simplest task, but Exped has released a pair of videos, one on course tuning of the back system, and one on fine tuning it. I spent about 15 mins getting the back system tuned perfectly for me (shoulder yoke all the way down, and the Ali stay bent slightly to match my spine). Having done so I don’t expect to have to adjust it again.
The hip belt has a zipped stretch side pocket on each side. This pocket is large enough for my first aid kit to fit in the left one, and for snacks or a compact camera to fit in the other.
The pack comes in both men’s and women’s fit. Alas Exped have fallen into the trap of assuming women want bright colours and only do the women’s version in Terracotta (a red) and Deep Sea Blue. Neither colour seemed to be ideal for not standing out. On the men’s range it comes in Black or Lichen Green. The green is a bit too light and bright for my tastes. Hence going for the black. One of my few complaints is the choices of colours. I got the men’s pack in black and even with my ample chest it seems to work OK.
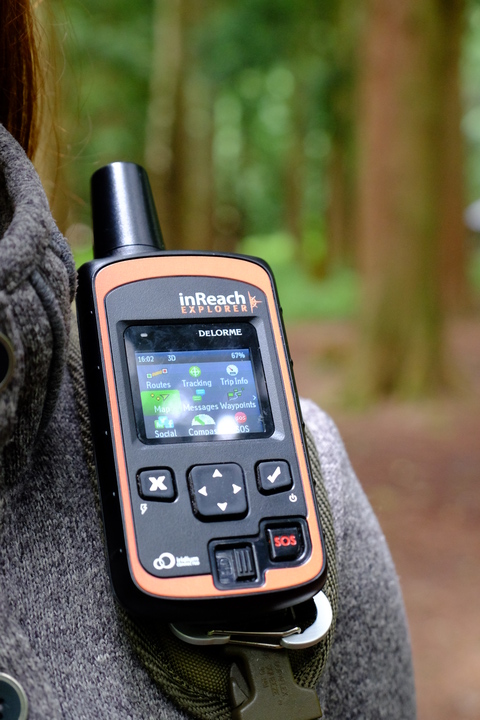
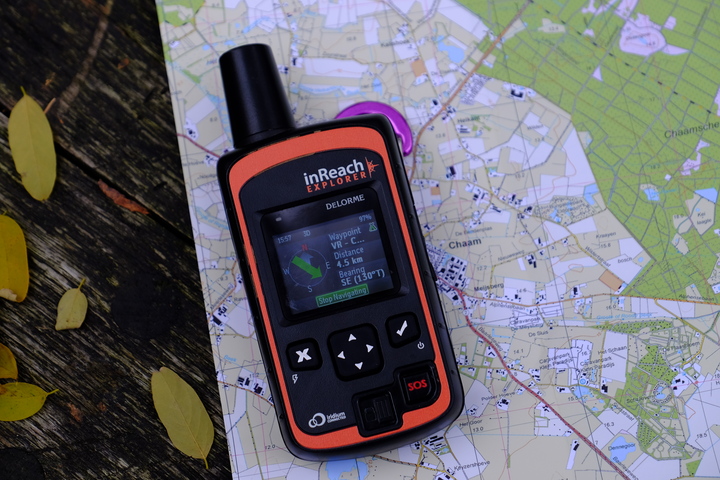
One modification I’ve done is to attach a small loop of bungee to the webbing on each shoulder strap, This gives me a horizontal point to attach my DeLorme inReach Explorer on the left strap, and my Petzl Zipka 2+ on the right strap. It’s a simple mod that adds a couple of grams.
Flash Pocket
To go with the Lightning range of packs Exped have released the Flash Pocket. Weighing 80g, this is a large dump pocket that attaches to the front of the pack. One side of the pocket is solid fabric, and one is mesh, depending on which way round you attach it allows you to either have some weather protection to it’s contents, or an airy breath-ability. I find the flash pocket useful for things like a damp tarp, water proof jacket, and the days food. As well as things I’ve forgotten to put into the pack before I closed it up. At about £8 quid it’s a nice extra to have.
The design of the pocket, whilst intended for the Lightning range of packs, is not limited to them, and could be used with other packs.
Summary
In summary this pack might not be the lightest on the market, but whereas many packs have the sole selling point of their weight, this pack’s ability to carry load more comfortably than any other pack I’ve come across sets it apart, and even justifies the few extra grams.
Light weight, yet able to take those heavier loads when necessary. I can’t recommend this pack highly enough. When I have the money I hope to get the 45L version for when the 60L is overkill.
The only area the pack is let down is in the available colours. If it came in a nice dark green, it would be perfect.
I bought my pack from Backpackinglight.co.uk and the flash pocket from Ultralight Outdoor Gear.